


SAP PO for Beginners Part – 10 – Interface Development – File (with File Content Conversion) to SFTP
In this post, “SAP PO for Beginners Part – 10 – Interface Development – File (with File Content Conversion) to SFTP,“ we will develop a file-to-SFTP interface from scratch. We will convert the flat file to XML format using File Content Conversion (FCC) and place it in the SFTP server location with SSH key authentication.
In short, below is the content we will be elaborate in this tutorial:
- Overview
- Scenario
- Objects involved in Interface Development
- Build Enterprise Service Repository Objects
- Build Communication Channels
- Build Integrated Configuration (ICO)
- Testing the Interface
1. Overview:
Expect there is a prerequisite from business on sending the level document from ECC Application server to a SFTP area with SSH key verification. We won’t send the level record for all intents and purposes, rather convert it to XML by Document Content Change. Additionally, for getting to SFTP, we won’t go with Fundamental auth (Username and secret phrase), rather we will go with SSH key confirmation where we create private and public SSH key matches through Clay programming and give the public key to the outsider who possesses the SFTP server. We should introduce the confidential key in the NWA-> Keys and Endorsements area and notice the keystore name and view in the collector correspondence channel for fruitful validation.
2.Scenario:

3. Objects Involved in Interface Development:
To begin with, we should make ESR objects like Information type, Message type, Administration Connection point, Message Planning, Activity Planning.
Second, we will make a shipper correspondence channel of connector type Document with Message Convention as Record Content Transformation.
Third, a beneficiary correspondence channel of connector type SFTP.
Fourth, SSH KEY matches through Clay programming and introduce it in PI NWA.
At long last, we will make an ICO and import the source, collector, and activity planning.
4. Build ESR Objects:
Prior to continuing with the formation of Correspondence channels, how about we start with the result structure creation.
Data Type:
Characterize the fields and events.
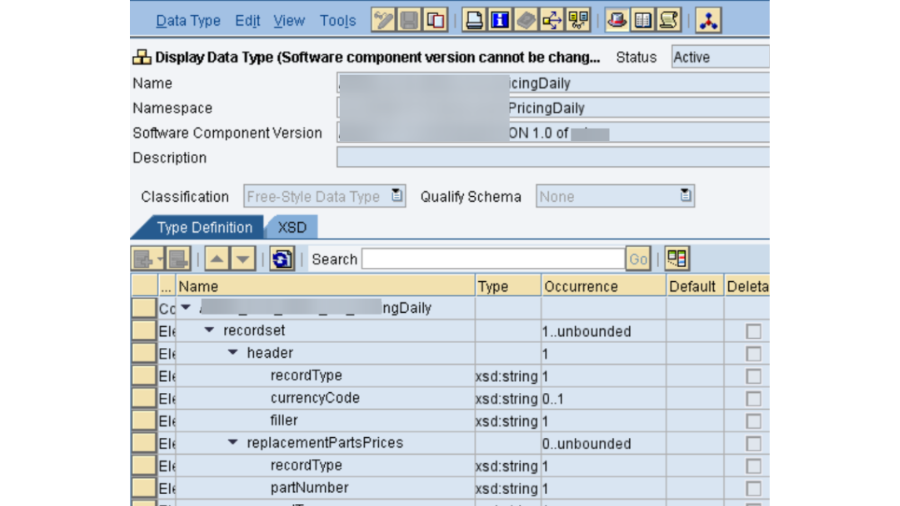
Message Type:
Wrap the information type with message type. Also, this message type and namespace, you need to give it in Record CONTENT Transformation which will come while making source correspondence channel.
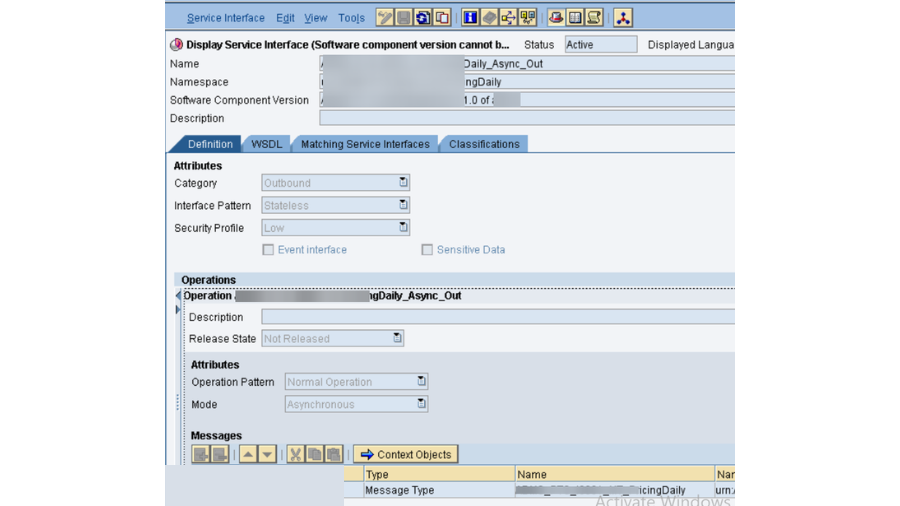
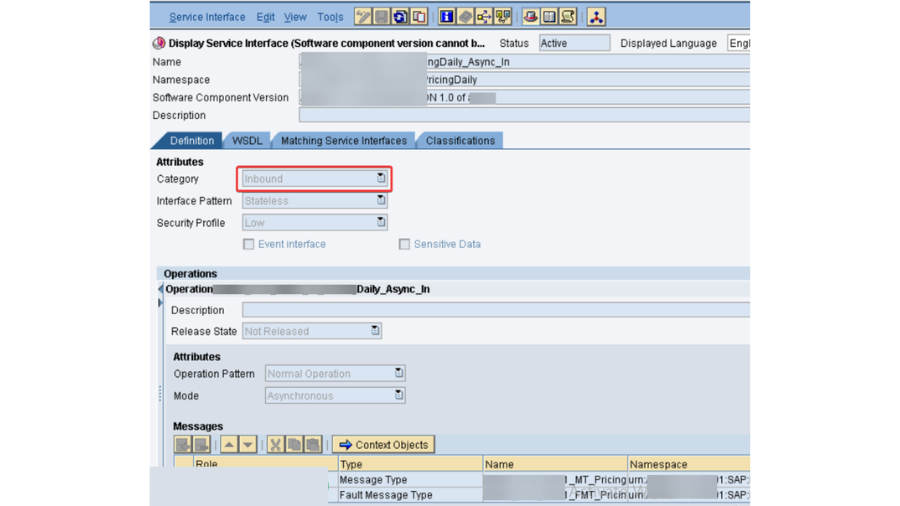
Service Interface:
Make two help interfaces. The justification for two help connection points is:
The record is passed from ECC to PI – Outbound Help Connection point – 1
PI to SFTP – Inbound Help Point of interaction – 2
In both help interfaces, the solicitation message type will be same, as we are passing one steady result structure.
Outbound Assistance Connection point:
Inbound Service Interface:
Message Mapping:
Import same message types in source and target area and perform balanced planning.
Click on SAVE and ACTIVATE.
Operation Mapping:
Import both the outbound and inbound assistance interfaces. Once imported, click on READ Tasks button which would peruse the message types put away in assistance interfaces.
When done, select the sort of planning and import the message planning made.
Click on SAVE and Enact.
ESR Items creation done. We should begin with the Reconciliation Items improvement.
5. Build Communication Channels:
Sender Communication Channel:
Open the Combination Registry – > Snap on Make New symbol and pick Correspondence Channel.
Give the channel a reasonable channel name and namespace and tap on Make. Pick Connector type as Record and Source Radio button.
Message Convention – Document Content Transformation
Under the Source tab, give the document way and the record name design.
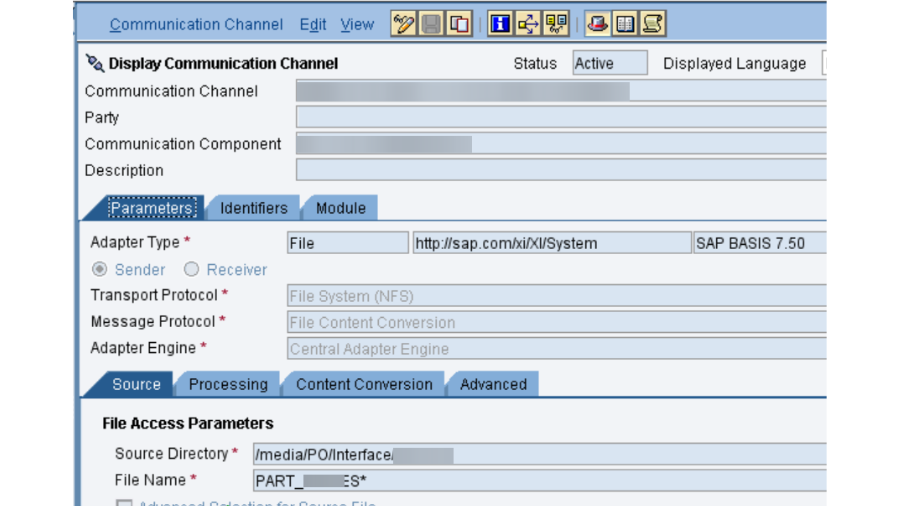
Under the Handling tab, give the nature of administration (for async interfaces, it should be Precisely Once all together/Precisely Once). In the event that Precisely Once all together is picked, you should give a line name in which the connection point will be handled.
Survey Stretch – 3600 (in secs)
Handling Mode – File and notice the Chronicle Index.
Void Document Dealing with – In the event that vacant record is set in AL11, this boundary can be kept up with for the expected move to be made in such cases. Default – Don’t make message
In the event that Message Convention is picked as Document Content Transformation, an extra tab will be empowered as Record CONTENT Change.
Content Conversion Tab:
Document Name – <Message Type Name>
Document Namespace – <Message Type Namespace>
Document Offset – <No. of lines to be skipped in the file – from top>
Recordset Name – <Root node name>
Recordset Structure – <Node name and its occurrence – 1 means node will appear 1 time and * means multiple>
Keyfield Name – <Field which must be there in file to start content conversion>
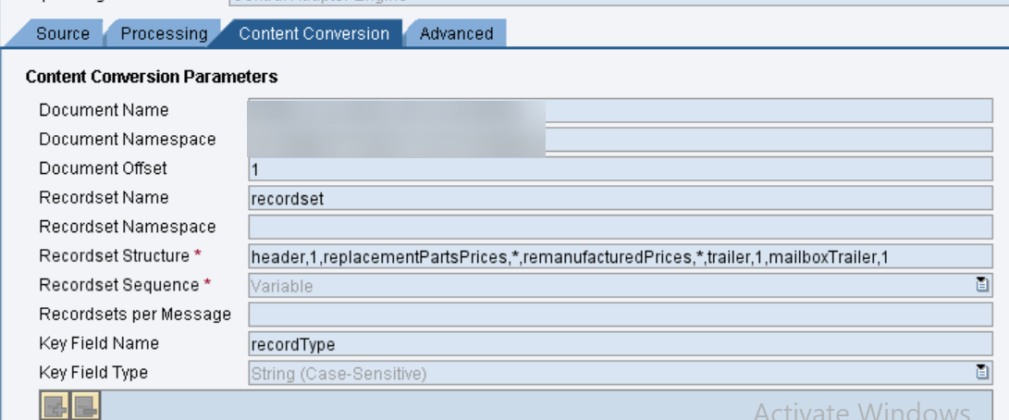
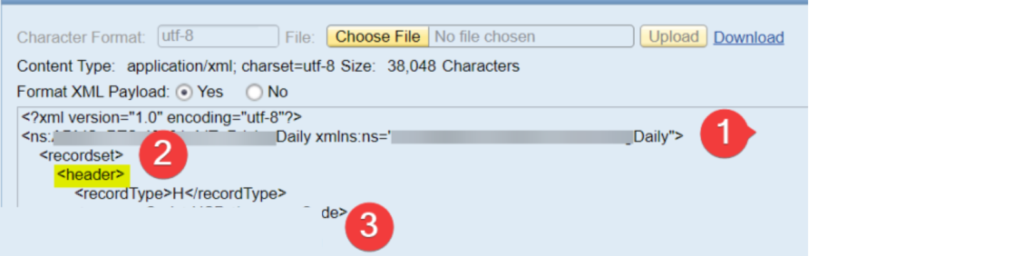
In the above picture, we can see that the primary hub is header, and it happens 1 time. There are 4 significant properties to be characterized to change it over completely to XML values.
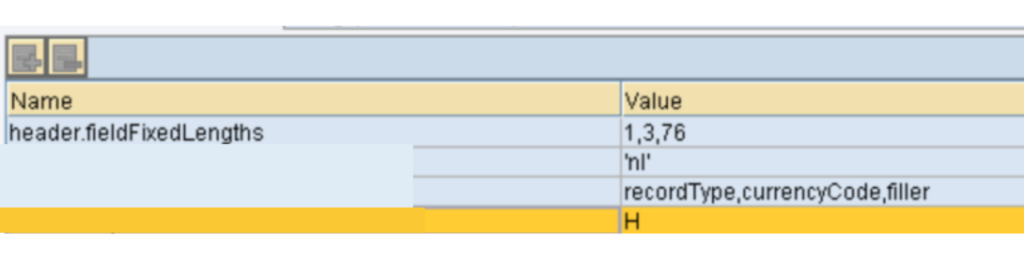
<Node_Name>.fieldFixedLengths
<Node_Name>.endSeparator
<Node_Name>.fieldNames
<Node_Name>.keyFieldValue
Push on the Add column symbol and supplement the underneath shown lines.
The following is the Level record.
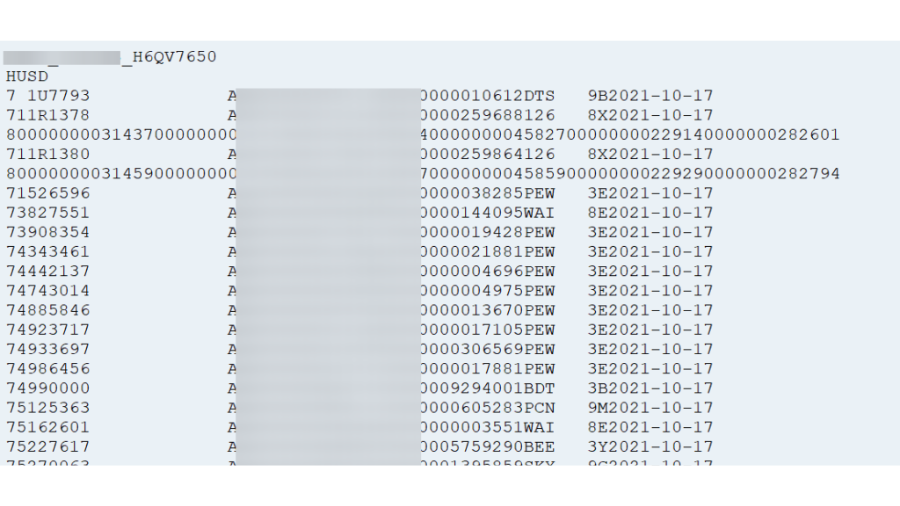
As we have referenced the Record Counterbalanced to 1, the primary line will be skirted in the change.
Next line is the header line. As we have referenced as RECORDTYPE as the key field name, framework will check for keyfield esteem present in document or not. On the off chance that present continue with the change or, in all likelihood skirt the line.
For this situation, keyfield esteem we referenced is H, and its additionally present in the level record at line 2. Subsequently continue for change.
First field name is record type and its length is 1, so record type XML label will contain esteem as H.
Next field name is CurrencyCode, and its length is 3, so in level document after H, 3 scorches will be managed and put away in CurrencyCode XML tag.
Next field in header is filler and its length is 76 which implies in level document there perhaps spaces in that first line end, and that is put away filler XML tag.
Also, after that no field name is accessible, framework will check for “endSeparator” property. As we have given “nl” (new line) as the separator, after that first line closes, framework will close the header tag and continue with the following XML tag referenced in the recordSetStructure.
1 – Record name and namespace
2 – RecordSet Name
3-According to the properties we gave, XML structure is framed. Filler is in void tag in light of the fact that XML wont store clear qualities.
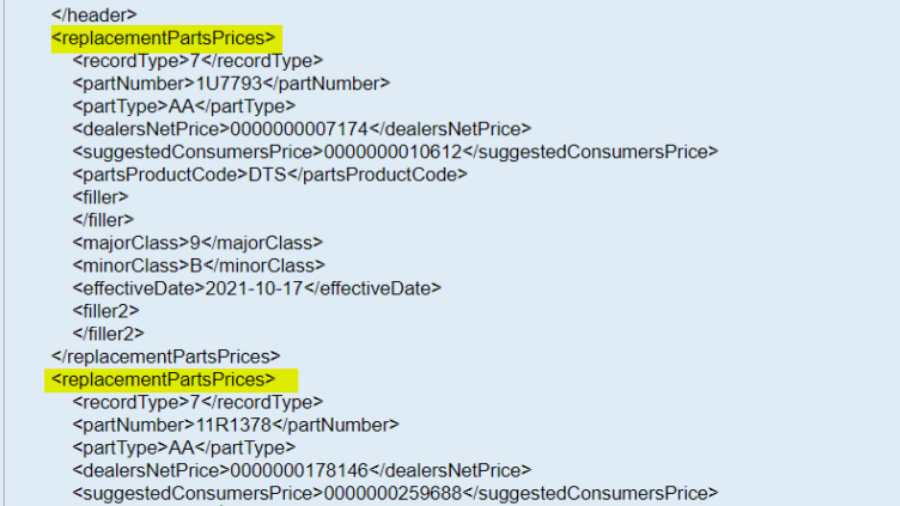
Same way the other XML labels are filled. Next is replacementPartsPrices and its event is * and that implies until the condition (keyFieldValue not in level record line) comes up short, this label will continue to populate.
The following is the properties for replacementPartsPrices:
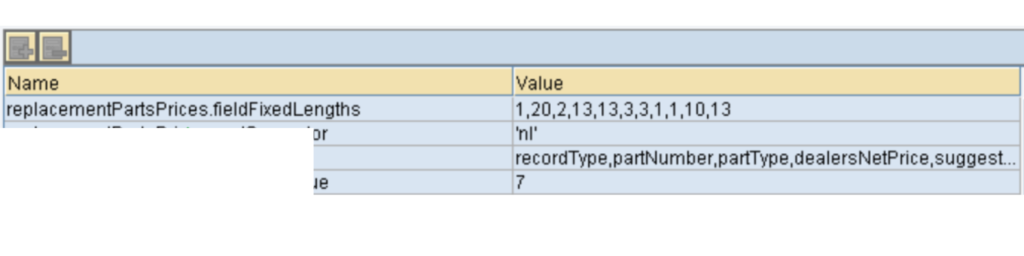
The keyFieldValue is 7. Framework will check for 7 toward the beginning of each line and continues with the transformation.
In the level record you can see, there are numerous 7 toward the beginning of the line and that many labels will show up for replacementPartsPrices.
Furthermore, that is all there is to it for Record Content Change. We will continue with the beneficiary correspondence channel.
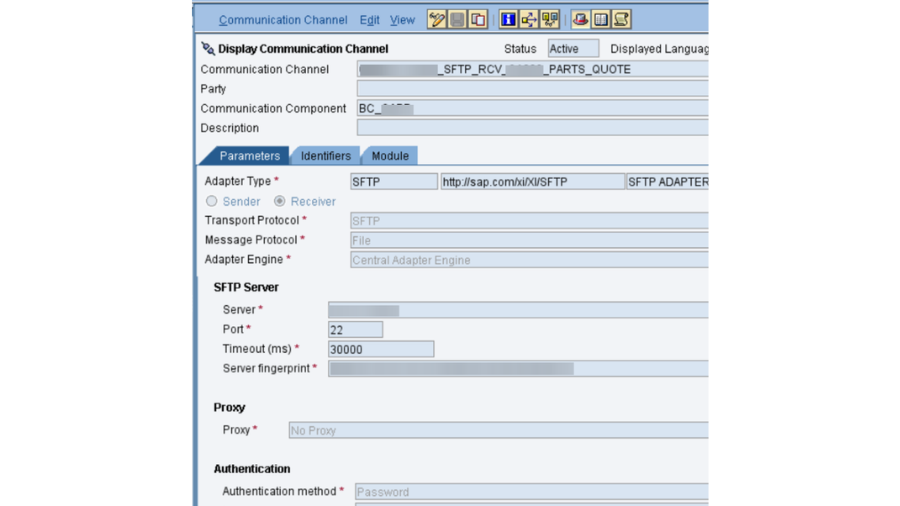
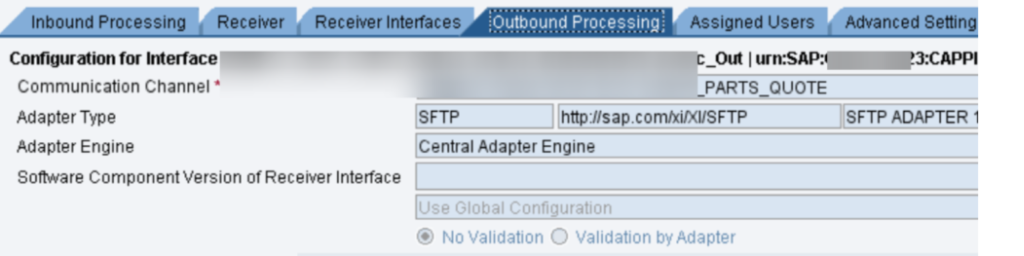
Click and Make New – > Correspondence Channel – > Pick Collector radio button and connector type as SFTP.
Give the SFTP server subtleties:
Server, Port, Break, Server Unique mark.
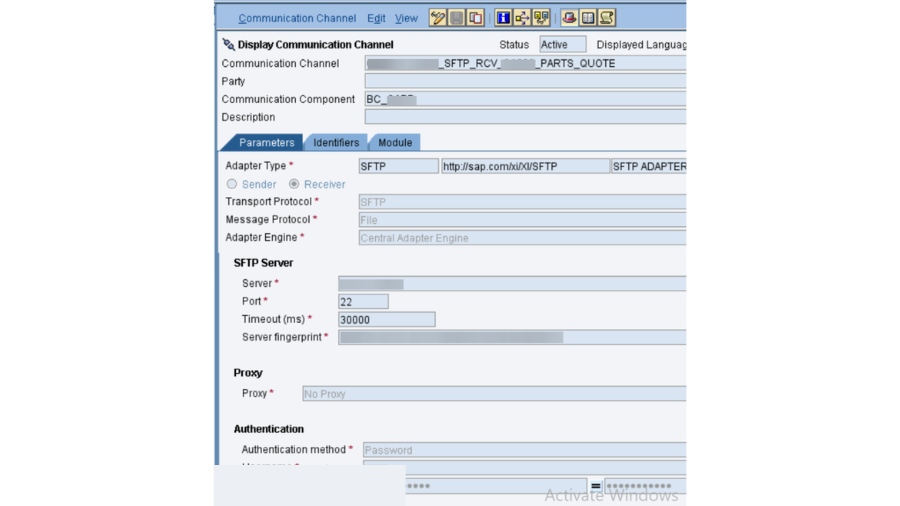
Validation mode as Secret key OR Confidential KEY OR BOTH.
We pick PRIVATE KEY.
Prior to making the key coordinates, how about we fill the other fields.
Filename and record way.
If timestamp required toward the finish of the filename, actually take a look at the choice “Add timestamp to filename”.
For making the SSH Key coordinates, how about we download the Clay programming.
Follow this connect to create the SSH key matches and they take care of the import cycle in SAP PI/PO.
Enter the keystore view and name in recipient correspondence channel and snap on SAVE and Order.
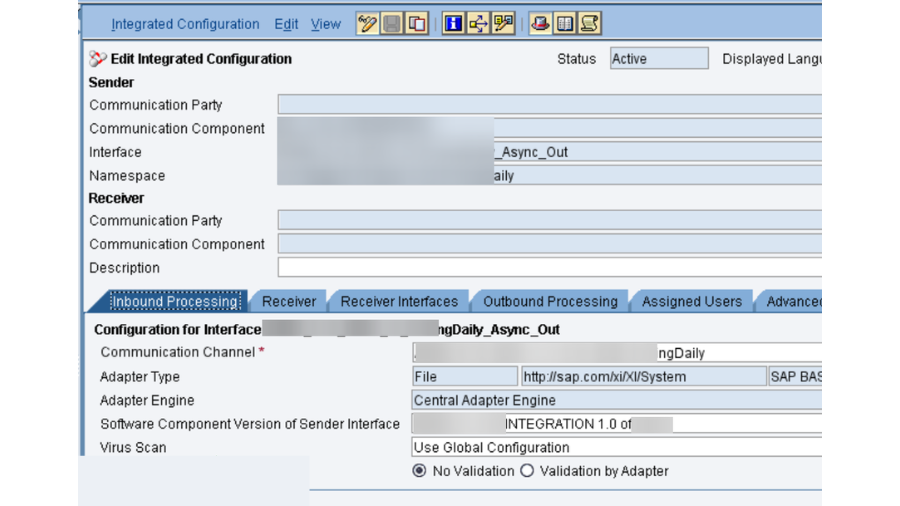
6. Build Integrated Configuration (ICO):
Click on NEW – > Coordinated Design.
Give the Coordinated design name and namespace. It ought to be indistinguishable from the ESR Administration Connection point name and namespace.
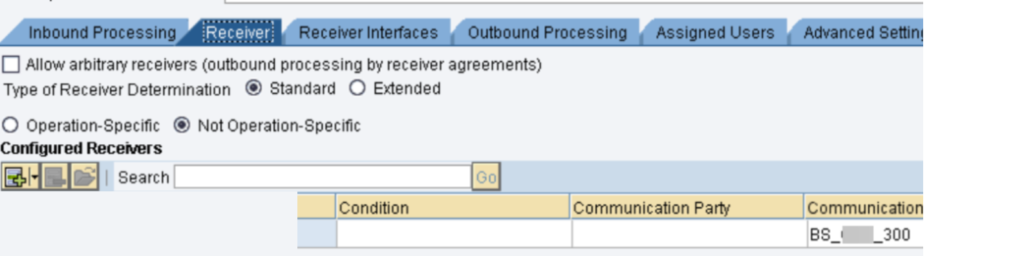
Import the shipper divert and in next tab, select the business part under which the recipient correspondence channel is made.
Determine recipient condition if any.
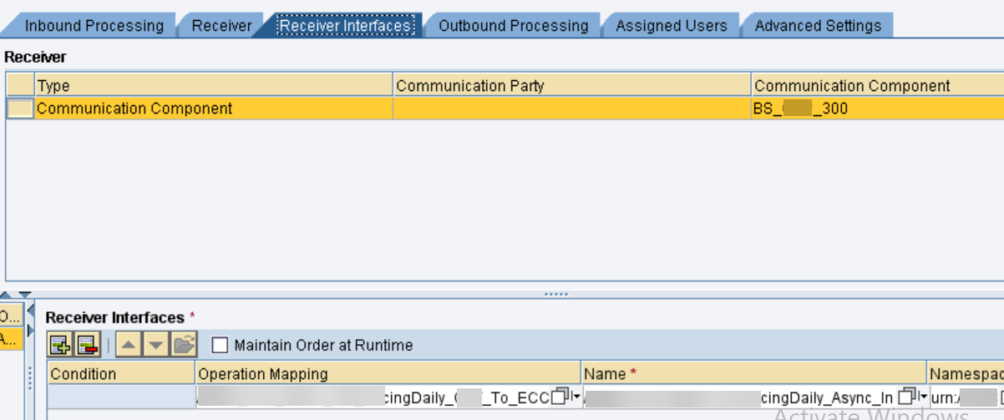
Import the Activity planning from ESR. Activity planning will naturally show assuming you have offered right Assistance Connection point name and namespace while characterizing Incorporated arrangement name and namespace.
Import the recipient correspondence channel.
Click on SAVE & ACTIVATE.
That is finished. We have made Document to SFTP interface without any preparation. We should test it.
7. Testing the Interface:
Place a level record in AL11 area and notice the registry way in shipper correspondence channel for the channel to get it and furthermore the document way, with the goal that a similar document isn’t surveyed sometime later.
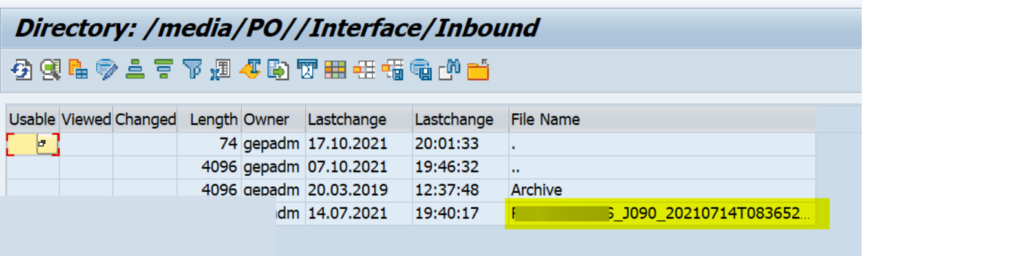
Begin the source correspondence channel and check whether the document gets gotten.
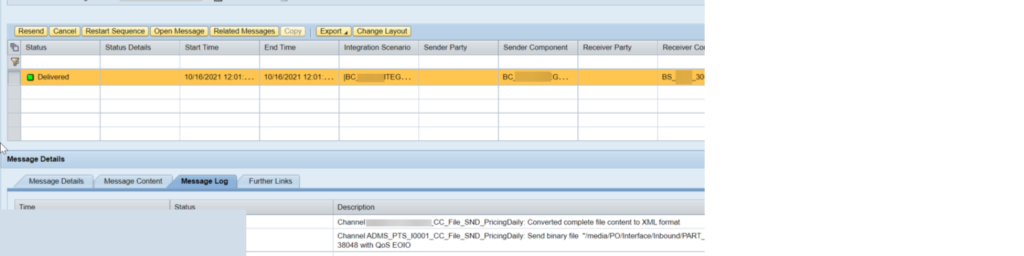
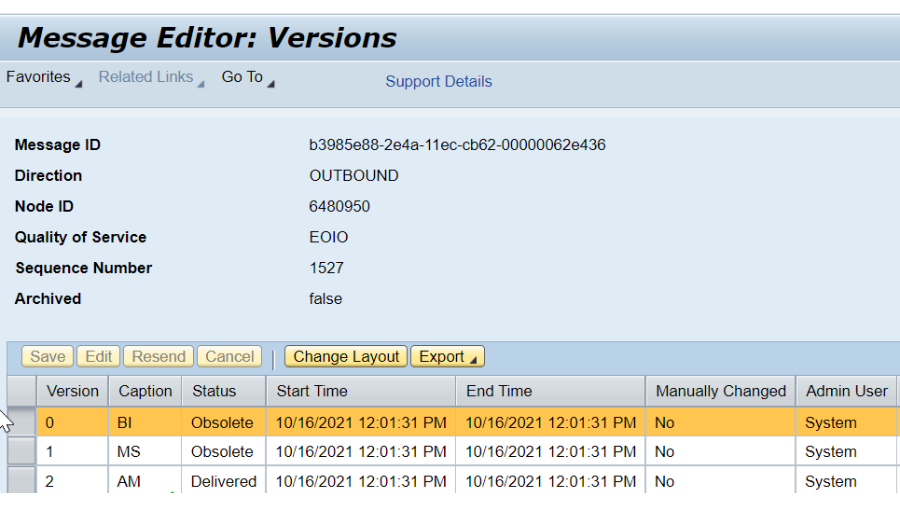
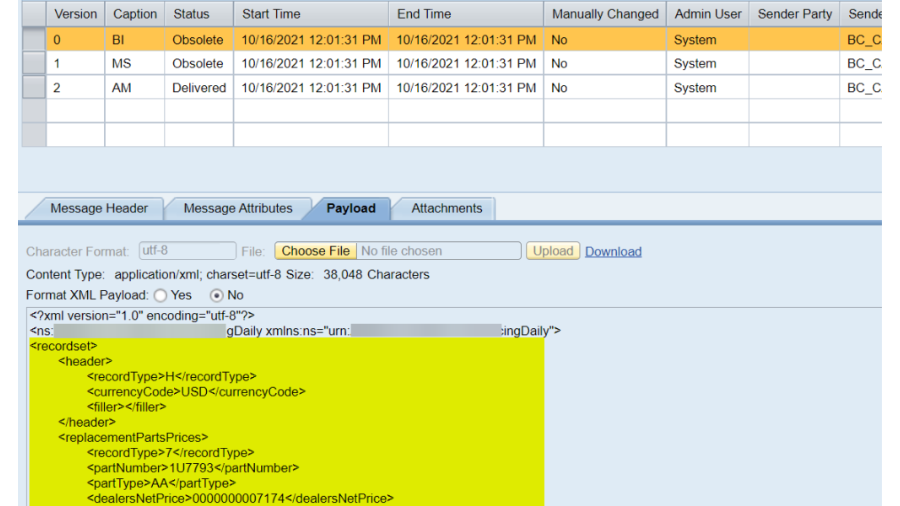
To see the document content change and effective planning, explore to the message and snap on OPEN MESSAGE button. Under the payload choice you can see the various variants of the payload.
0 – represents the before-mapping version
2 – represents the after-mapping version
I trust you were able to learn about this intriguing topic in “SAP PO for Beginners Part – 10 – Interface Development – File (with File Content Conversion) to SFTP.“ I hope the insights provided have been valuable in understanding how to develop and manage file interfaces with content conversion to SFTP.
YOU MAY BE INTERESTED IN
ABAP Test Cockpit(ATC) – Introduction and Steps
SAP ABAP future in next coming years