


SAP Adobe Form Tutorial Part XIII How to Print two Tables Adjacent to each other?
Displaying two tables side by side on a SAP Adobe Form is a common requirement, but many of us find it challenging to achieve on the first try. If you search for a solution using keywords such as “SAP Adobe Form Tutorial Part XIII How to Print two Tables Adjacent to each other“ or “Data Overflow Issue in Sub Forms Tables in SAP Adobe Forms,” you will find the following links as the top few search results.
Situation 1 asked by one Client
I have a form with a body page and two tables. The body page’s property is set to ‘Streamed’ with ‘through and through’ as the stream direction, and the checkbox for page break is enabled. In “SAP Adobe Form Tutorial Part XIII How to Print two Tables Adjacent to each other“, we will explore how to configure the form to print these two tables side by side on the same page.
Necessity
The two tables should be printed nearby one another.
Approach followed until now
- Since the body page is ‘Streamed’ type, the two tables are set one underneath the other (Tab1 and Tab2). So I attempted to set the Stream bearing of the Body page to ‘Western text’. In any case, this didn’t address the issue as since it is set to ‘western text’, solely after Tab1 is delivered, table Tab2 begins printing itself, which isn’t wanted. Both the tables ought to be printed simultaneously.
- I enclosed both the tables by one sub form with ‘Type’ set to ‘Situated’ and set the checkbox for the page break. Presently I organized the tables nearby one another. However, the checkbox for page break for both the tables was handicapped and along these lines in the event that there isn’t adequate room to print the all out records of both the tables, the total tables are moved to another page leaving the past page clear.
Similar Scenario asked by another User
“I generally disapprove of 2 tables lying next to each other – say Table An on the left and Table B on the right. At the point when Table B has a flood of information in the following page. Then the overflown dataset lines of Table B goes to the left on the following page rather than its segment head for example .right of Table A.
This happens just when table B is spilling over and Table An on the left excess on Page 1.”
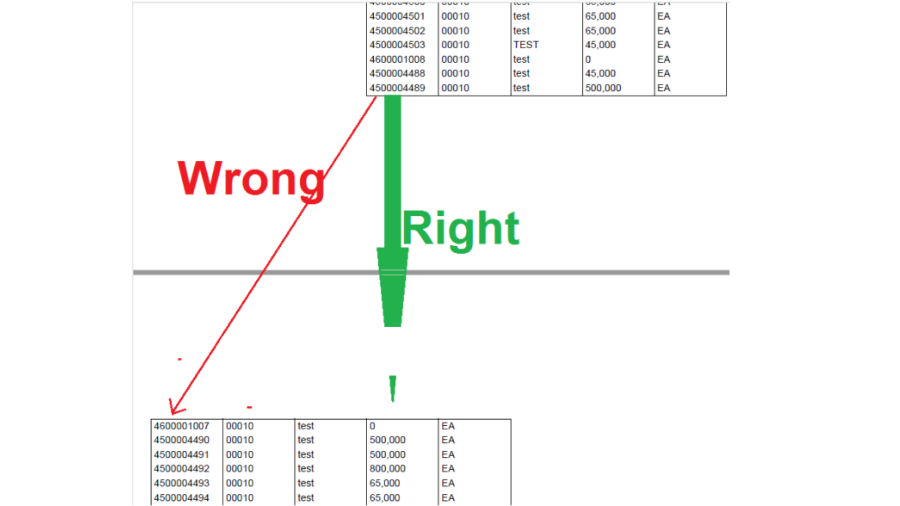
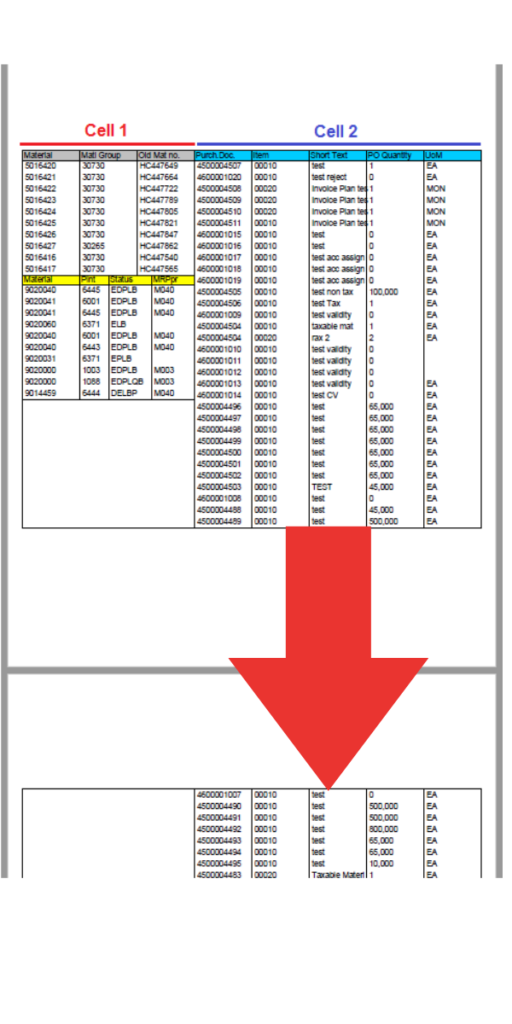
On the off chance that you didn’t comprehend the issue situation, then, at that point, the under two pictures ought to help. Keep an eye on page 2, the right-hand side table is spilling over to page 2 from page 1, yet it has moved to the left as opposed to remaining on the right side.
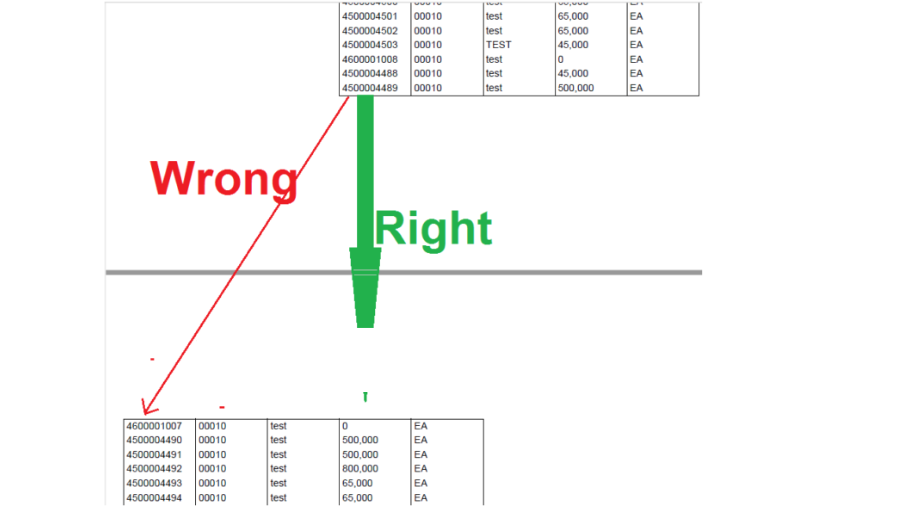
Trust you figure out the situation now.
There are numerous ideas to accomplish this. Some said to connect every one of the inward tables to one major inside table to be shown. It would work, however that is super unwieldy assuming you have numerous tables.
The other most normal viable arrangement gave is to placed the tables in two different SubForms, make them Streamed with page break and print them together. Allow us to do likewise.
We are not telling you the best way to make the tables and SubForm. We accept, you know it so we are simply showing the Connection point and Structure settings and codes.
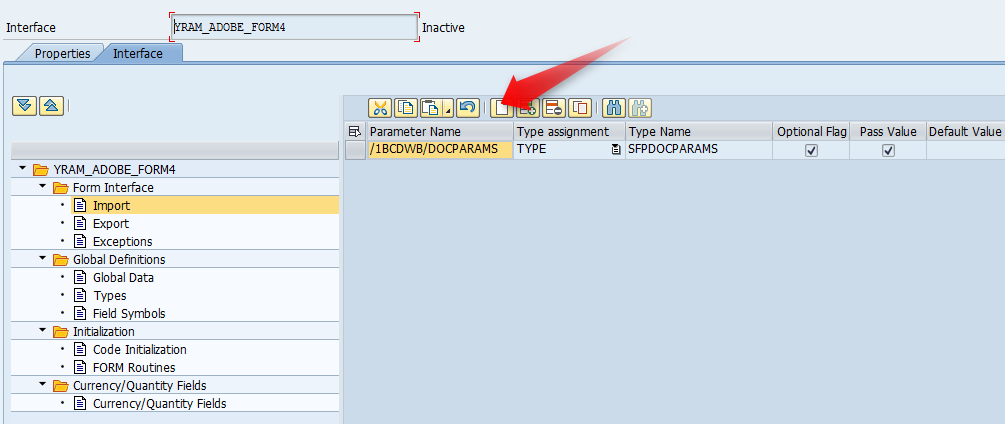
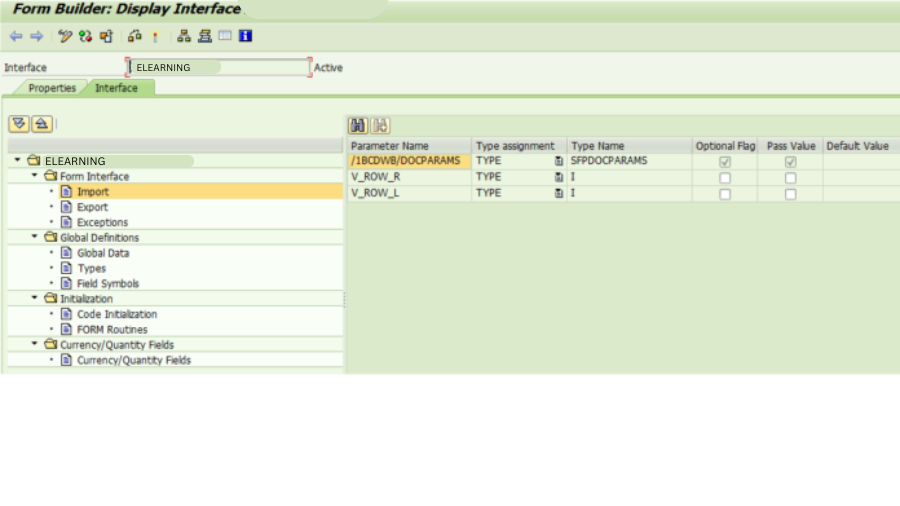
Adobe Form Interface
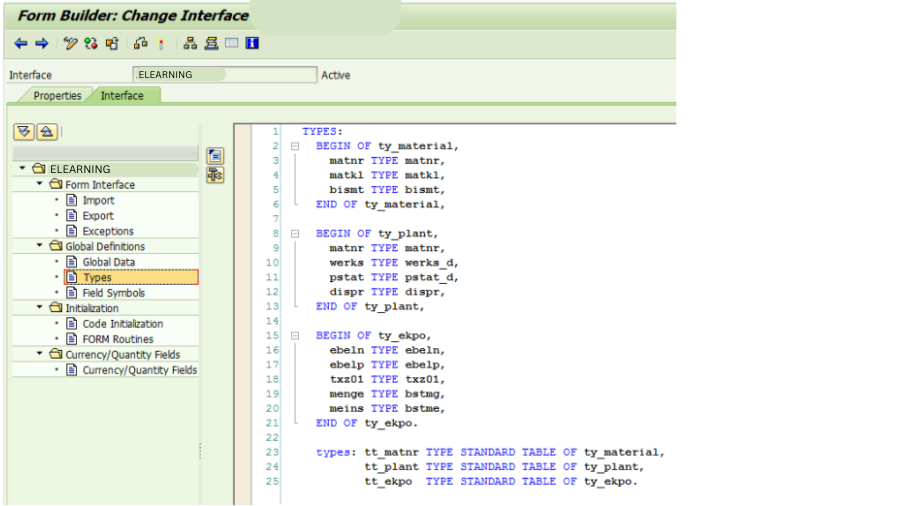
TYPES
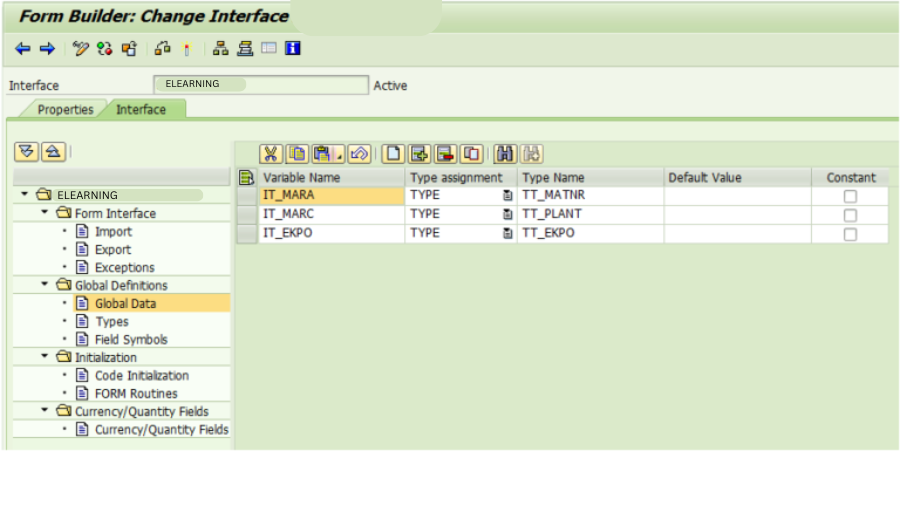
Global Data
Code Initialization
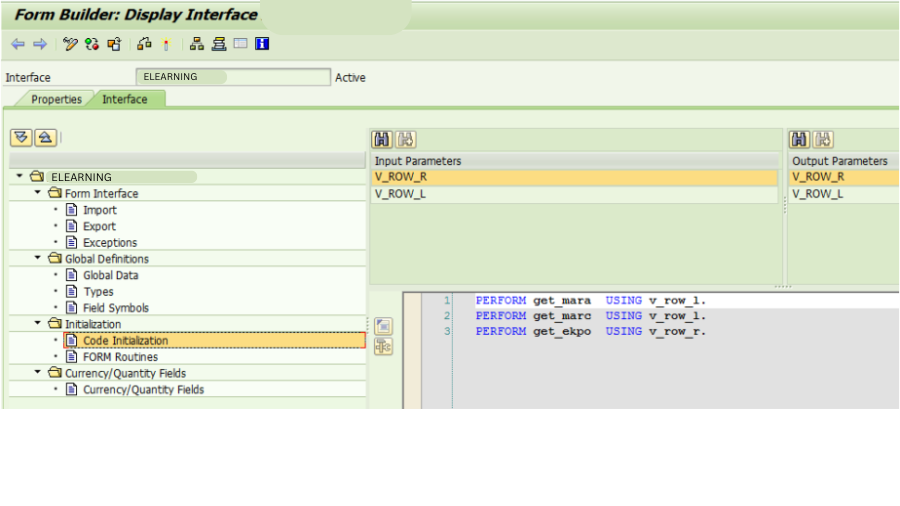
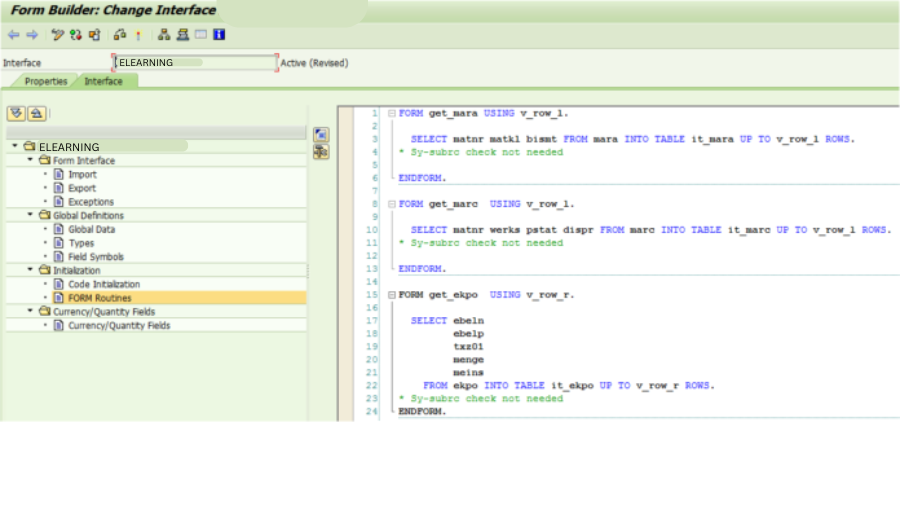
Form Routines
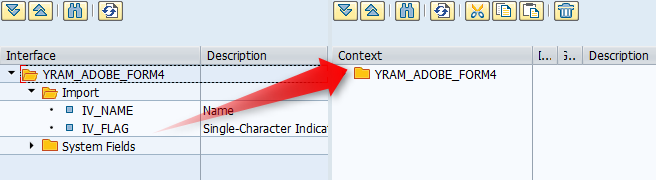
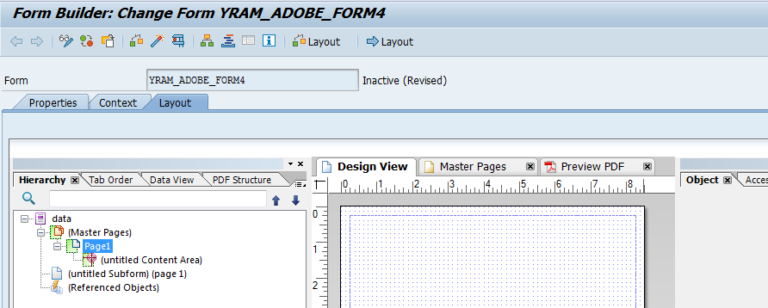
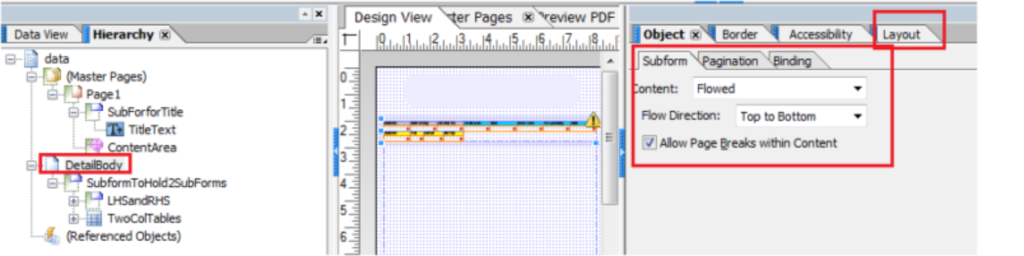
The Form is designed as below.
Two SubForms LHS and RHS are enclosed by one SubForm LHSandRHS. MARA_Table SubForm and MARC_Table SubForm are wrapped inside LHS SubForm. Likewise, EKPO_Table SubForm is wrapped inside RSH SubForm.
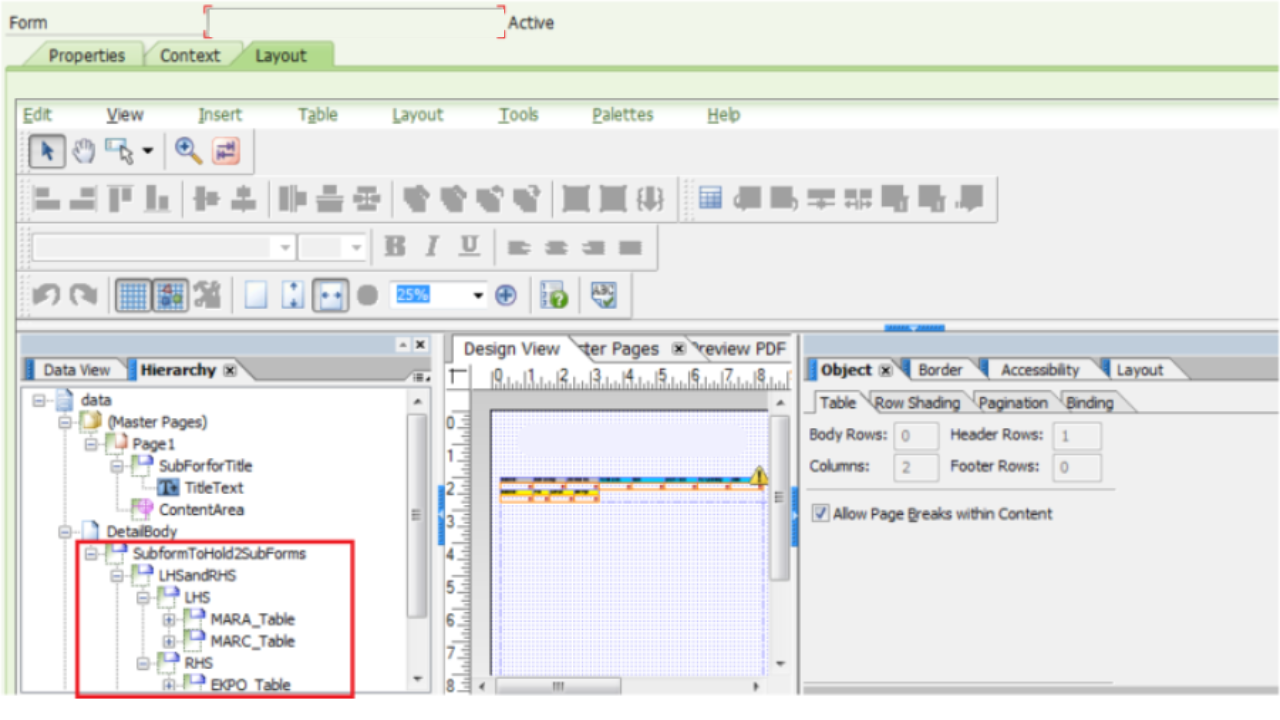

The following is the extended perspective on all the Ordered progression Items.
All the SubForms are Items are Streamed with Stream Course Western Text.
Additionally, remember to make the Page DetailBody Content as Streamed and Permit Page Breaks with Content.
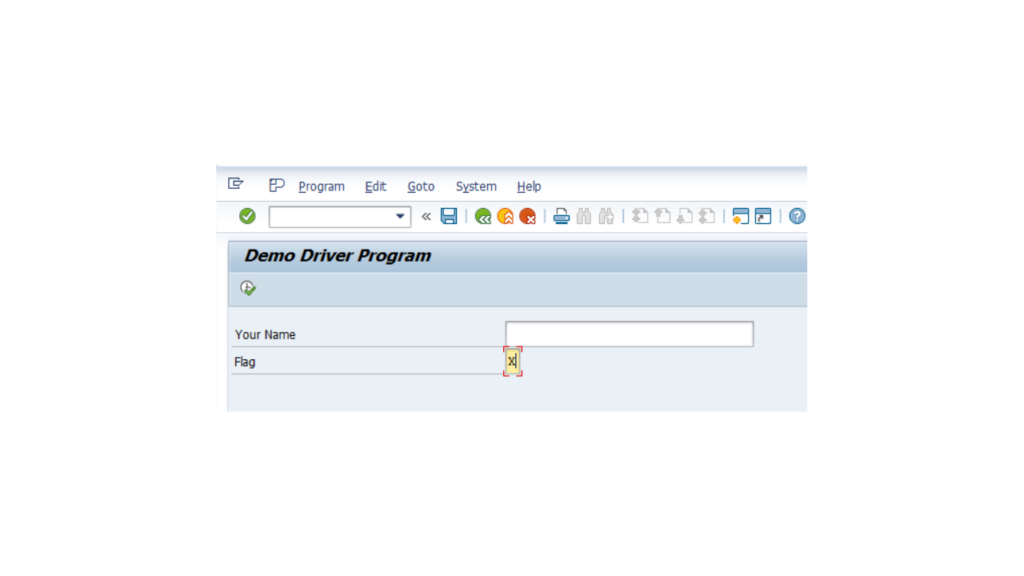
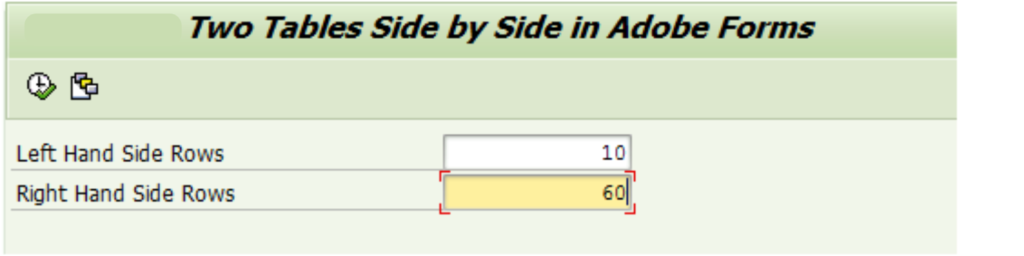
We wrote the below Driver Program to test our form.
***---------------------------------------------------------------------*
*** Date   :19/03/2025                                               *
*** Author :Varad(www.elearningsolutions.co.in)                                                 *
*** Title  :Demo Printing of Tables Side by Side in Adobe with      *
***         Overflow to next page                                   *
***---------------------------------------------------------------------*
REPORT ELEARNING.

PARAMETERS:
p_rowl TYPE i,  " Number of Rows
p_rowr TYPE i.  " Number of Rows

CONSTANTS : gv_form_name TYPE fpname VALUE 'ELEARNING'.
**&&~~ Data Objects
DATA: gv_fm_name         TYPE rs38l_fnam,      " FM Name
gs_fp_docparams    TYPE sfpdocparams,
gs_fp_outputparams TYPE sfpoutputparams.

*&---------------------------------------------------------------------*
**&&~~ Form Processing: Call Form - Open
*
CALL FUNCTION 'FP_JOB_OPEN'
CHANGING
ie_outputparams = gs_fp_outputparams
EXCEPTIONS
cancel          = 1
usage_error     = 2
system_error    = 3
internal_error  = 4
OTHERS          = 5.
IF sy-subrc <> 0.
" Suitable Error Handling
ENDIF.
*&---------------------------------------------------------------------*
**&&~~ Get the Function module name based on Form Name
*
CALL FUNCTION 'FP_FUNCTION_MODULE_NAME'
EXPORTING
i_name     = gv_form_name
IMPORTING
e_funcname = gv_fm_name.
IF sy-subrc <> 0.
" Suitable Error Handling
ENDIF.
*&---------------------------------------------------------------------*
**&&~~ Take the FM name by executing the form - by using Pattern-
**&&~~ call that FM and replace the FM Name by gv_fm_name
*
**&&~~ Call the Generated FM
CALL FUNCTION gv_fm_name   "'/1BCDWB/SM00000176'
EXPORTING
/1bcdwb/docparams = gs_fp_docparams
v_row_r           = p_rowr
v_row_l           = p_rowl
EXCEPTIONS
usage_error       = 1
system_error      = 2
internal_error    = 3
OTHERS            = 4.
IF sy-subrc <> 0.

* Implement suitable error handling here
ENDIF.
*&---------------------------------------------------------------------*
**&&~~ Form Processing: Call Form - Open
*
CALL FUNCTION 'FP_JOB_CLOSE'
* IMPORTING
*   E_RESULT             =
EXCEPTIONS
usage_error    = 1
system_error   = 2
internal_error = 3
OTHERS         = 4.
IF sy-subrc <> 0.
* Implement suitable error handling here
ENDIF.
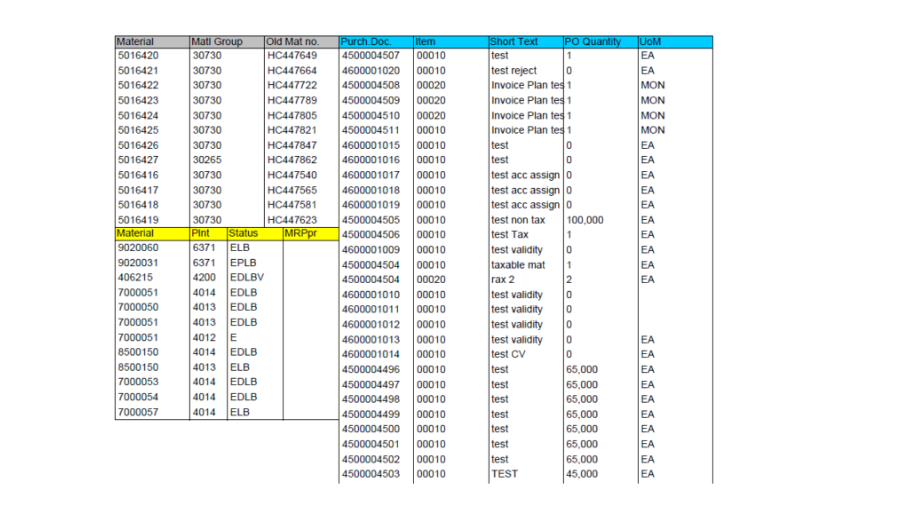
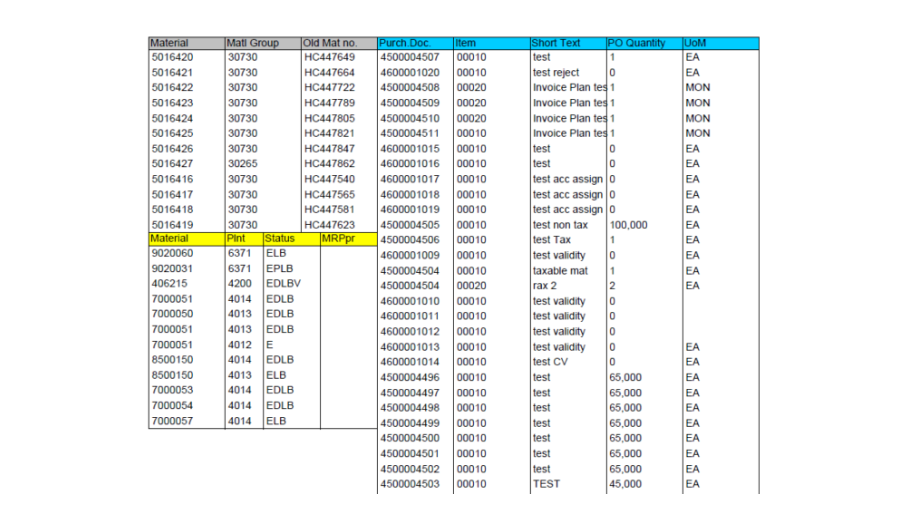
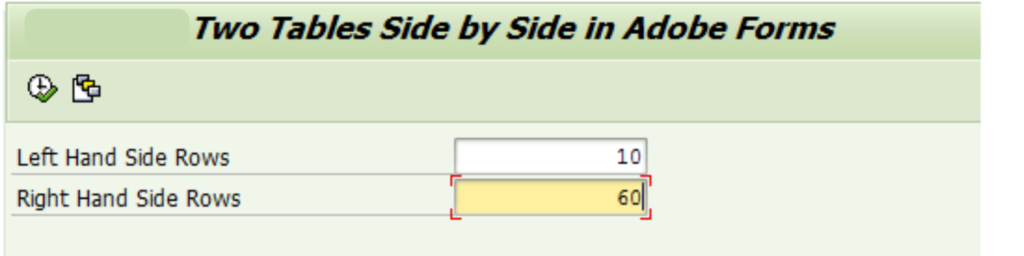
We should test it. To keep the left side table inside the principal page, we give a lower number to choose on the determination screen. Whilright-handt hand side table we pull more columns to drive it to spill over to the following page.
The main page looks great. The left hand side quits developing while the right hand side develops to next page.
However, look, on the following page the right hand side has been moved to the left side. This isn’t the very thing that our end clients need. The Purch Doc segment ought to be lined up with the section from the principal page.
Where did it go wrong? Allow us to check the design and settings once more.

We have set the Subform Content as Streamed for Detail, LeftHandSide (LHS), RHS and all SubForms are Streamed. In any case, the design in the subsequent page is moved to left. We attempted to adjust the Stream Course Through and through to Western Text. Be that as it may, it didn’t help.
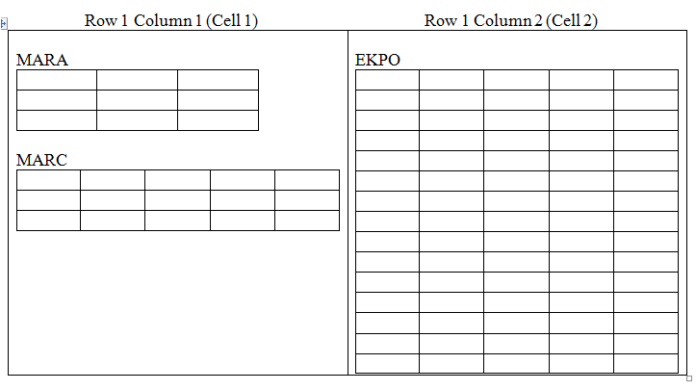
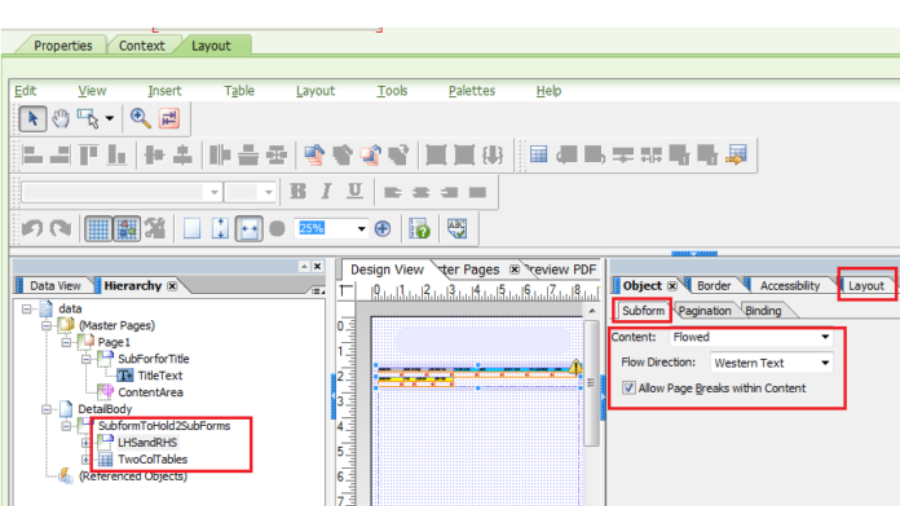
So we were constrained to attempt an alternate methodology. We will probably make a table with 1 line and 2 segments i.e it would have just 2 cells. Line 1 Segment 1 would have every one of the LHS subforms (2 tables mara and marc information) and Row1 Section 2 would have every one of the RHS subforms (1 table with ekpo information).
We want to wrap the two cells into subform and make them Streamed.
The following is a table with 2 cells and in every cell we would put subforms for our information.

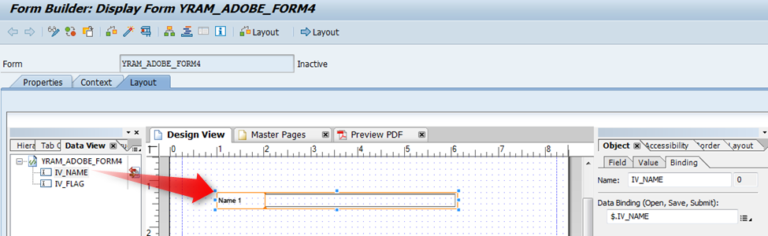
We ought to get it going. Permit us first to make a Table with one Line and two Segments.
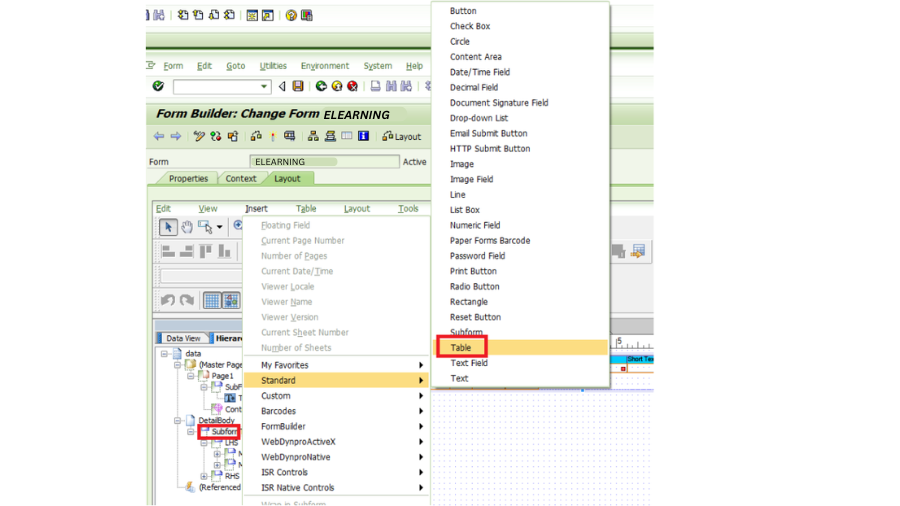

We have renamed the table to TwoColTables. Allow us to rename Cell1 to LHS and Cell2 to RHS.

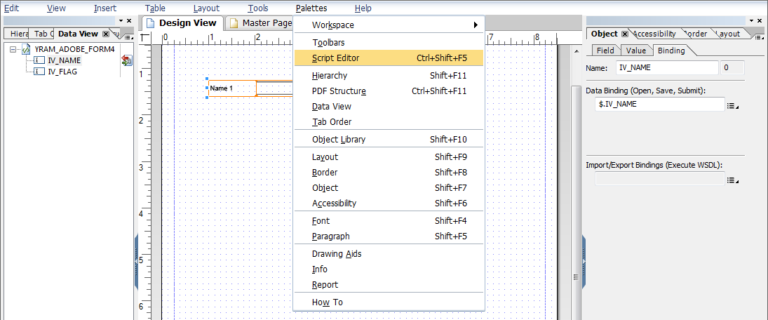
Presently right snap on Cell1 and Enclose by SubForm. Wrap Cell2 to SubForm as well.

Subsequent to wrapping and renaming, it would look like beneath.

Erase the texts LHS and RHS.
Presently drag LHS from SubformToHold2SubForms above and put into this LHS in the Row1 of the table.
Comparatively drag RHS from SubformToHold2SubForms above and put into this RHS in the Row1 of the table.
On the other hand, you can make these subforms in the LHS and RHS cell new. Yet, we are sluggish and we need to utilize what we did before.

It ought to look like beneath.

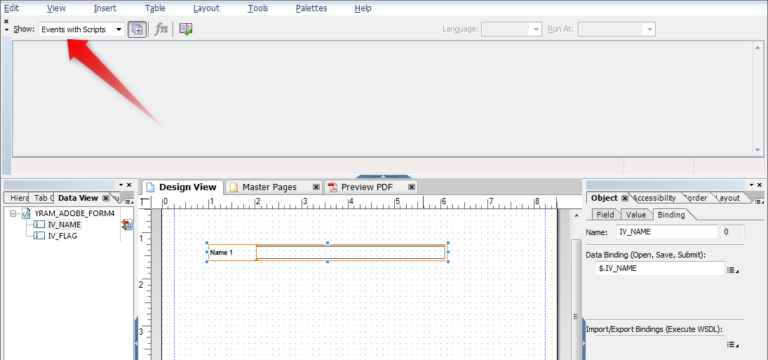
You want to have all the SubForms as Streamed expect the two Cells which were wrapped as SubForms. They should be Situated.

Positioned SubForm Cell 1 (LHS)

Positioned SubForm Cell 2 (RHS)

This is the stunt of this post. All streamed aside from the two cells which must be Situated. The two cells Content must be set as Situated in light of the fact that you would rather not permit the cells to move around openly. The width (and beginning x,y organizes) of the cells are fixed to the position you set. So when any one cell spills over to the following page, it actually is on a similar arrangement as at the main page.
How about we test now. Run the Print Program
Your table currently is streaming accurately. In the event that your left side table or right side table don’t begin from a similar level of the page or position (Y Coordinate), then, at that point, you should make them 0, 0 in the Design or some other worth you need. So both the tables start from a similar position and stream down.

I trust you found this tutorial helpful. The issue of printing two tables adjacent to each other is quite common, and the solution is also relatively straightforward. For a detailed guide on “SAP Adobe Form Tutorial Part XIII How to Print two Tables Adjacent to each other,” stay tuned as we explore this topic further.
YOU MAY BE INTERESTED IN
Unleashing the Power of Search Help Exit in SAP ABAP
Introduction to SAP UI5 Development: Your Comprehensive Guide
SAP ABAP Online Training: Advanced Business Application
SAP Adobe Form Tutorial Part XIIHow to Convert Smartform to Adobe Form?