


SAP PO for Beginners Part – 17 – Checklist and Measures to be taken for SAP PO Support Package Upgrade
This blog will assist you in understanding what a support package and patch level mean in the SAP PO environment, along with the checklist and Measures to be taken for SAP PO Support Package Upgrade It covers the key steps required post-upgrade to ensure smooth operation and minimal disruption.
So, below is the content we will elaborate on in this tutorial, including the checklist and measures to be taken for SAP PO Support Package upgrade to ensure a smooth and efficient process.
- Overview
- What is a Support Package ?
- Difference between Support Package and Patch Update
- What we have planned for our client
- Planning for SP Upgrade
1. Overview: Checklist and Measures to be taken for SAP PO Support Package Upgrade
In this post, we will explore the checklist and Measures to be taken for SAP PO Support Package Upgrade from a PO developer’s perspective. Additionally, we will also discuss the differences between a support package upgrade and a patch level upgrade, providing a comprehensive understanding of both processes.
2. What is a Support Package ?
At the point when an end client of SAP finds a bug in the SAP item, he reports something very similar to Drain support, SAP engineers really look at something similar and foster a rectification for the equivalent. This revision is shipped off the client as a NOTE.
In the event that the equivalent or comparative bug is accounted for by different clients or end clients, then SAP perceives such bug rectifies them and gathers this multitude of remedies in a single spot and adds a few improvements to the prior rendition of SAP and afterward calls this as a Help PACK.
3. Difference between Support Package and Patch Update:
A Fix contains a fix for a singular Programming Part, which has a place with a particular SP discharge while a Help Bundle Stack (SP) is a significant assortment of bug fixes and element improvements and each SP contains an assortment of all the Product Parts which make up the PI framework.
SAP discharges fixes, as a fix, for every one of the PI Programming Parts consistently. These fixes might be delivered consistently, yet this relies upon the PI discharge, the SP discharge and the particular Programming Part.
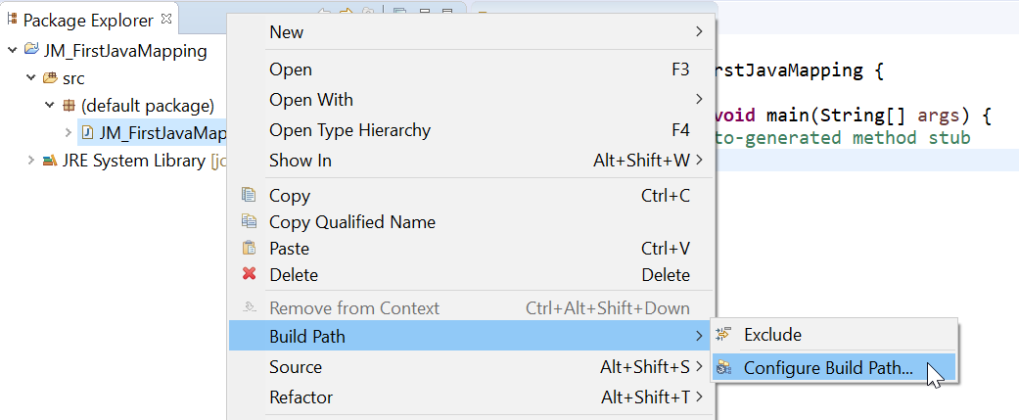
The most effective method to check SP and Fix level of your PO framework ?
This has been explained in my below blog link:
4. What we have planned for our client: checklist and Measures to be taken for SAP PO Support Package Upgrade
We are updating the PO stack from SP 10 to SP21 which would bring new highlights and settled bug fixes. The most recent SP discharge as to introduce date is SP22 yet doesn’t prescribe refreshing to approach SP discharge as it’s anything but a steady delivery.
5. Planning for SP Upgrade:
- Prior to continuing with SP Update, we really want to design the pre and post exercises required subsequent to redesigning. The exercises ought to be recorded down in a sheet and should be explored with client, with consideration of Premise group.
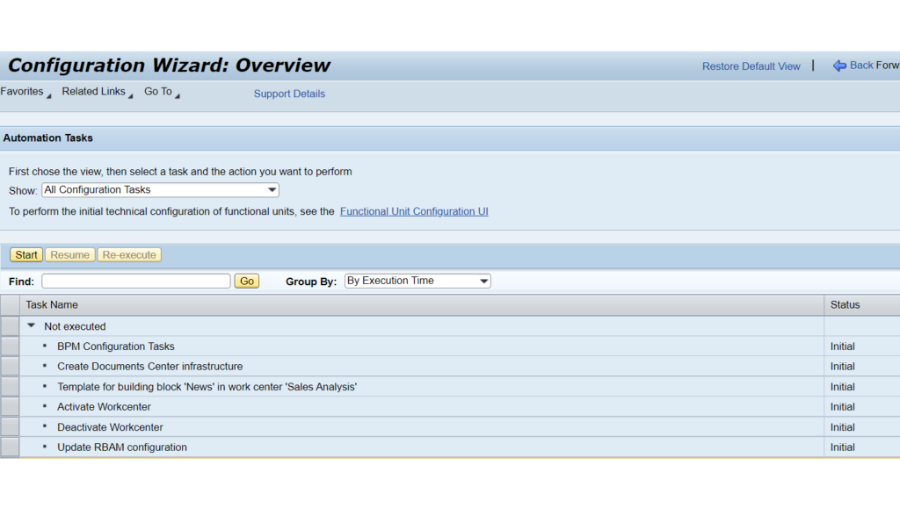
- There is a compulsory action to be finished after SP Update action. Executing the post SP update Design Wizard according to note ##1444305 Setup Wizard: PI/ESR Backing Bundle Update, is a compulsory post SP update action. Begin the NetWeaver Head and explore to “Arrangement The executives – > Situations – > Design Wizard”. Select in the dropdown list “All design assignments” the undertaking “PI/ESR Backing Bundle Update”.
- The exercises ought to be ordered into many sub-classes. The sub-classes which I referenced in my arrangement was:
Endeavors (in days)
Setups to be checked
Points of interaction to be tried
New highlights that accompany new SP Overhaul
- First sub-classification is Exertion Assessment. I have breakdown the subtleties on the endeavors required by Premise + PO + Utilitarian colleagues.
Efforts (in days) involved by the BASIS + PO Consultants
Endeavors engaged with PO NetWeaver Director check
engaged with PO Connector network check
engaged with PO to drain to PO network interminably
Endeavors engaged with PO Connection point testing
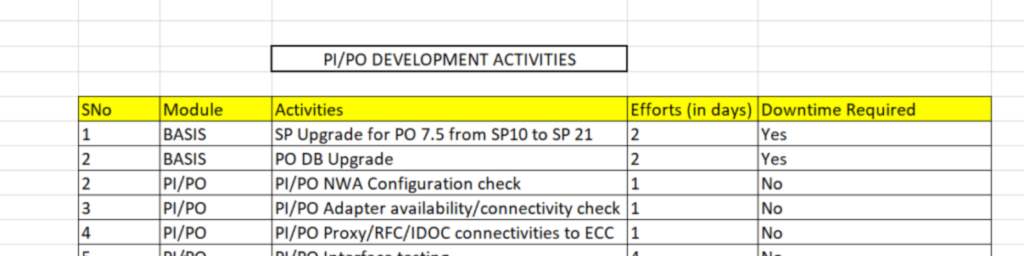
For our situation, we are doing PO DB Update additionally, that is the reason I have included it. It’s absolutely Premise work, so we can focus on the other exercises.
- I have presented another significant segment called; Free time REQUIRED. In view of this main we will actually want to affirm to business and our utilitarian colleagues on when to begin their improvement exercises which includes interface testing.
- Thus, we want to compute the free time days too. Honestly, the free time that is expected for PO SP Redesign exercises goes from 3-4 days, since there will be issues on post SP Update which requires some investment to determine. Thus, on a more secure side, its in every case better to add support time, with the goal that we can stay away from superfluous strain from business.
- The following sub-classification we need to investigate is: Setups.
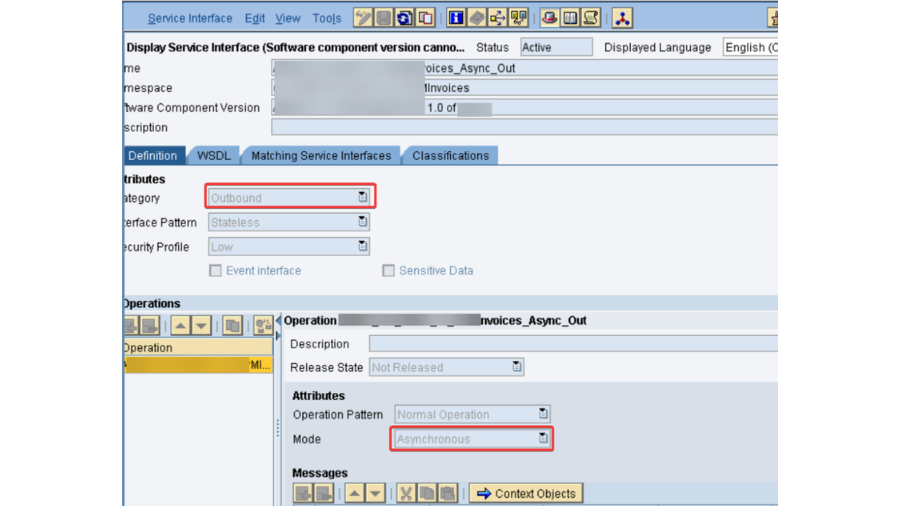
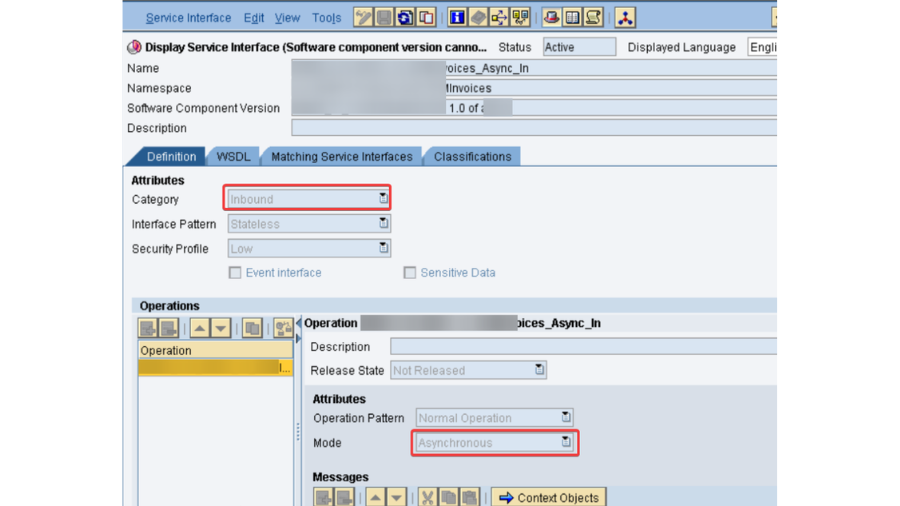
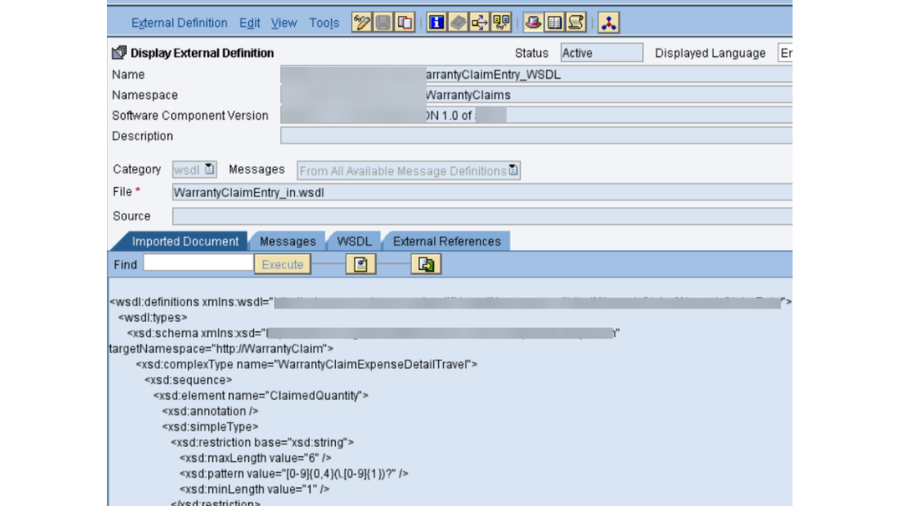
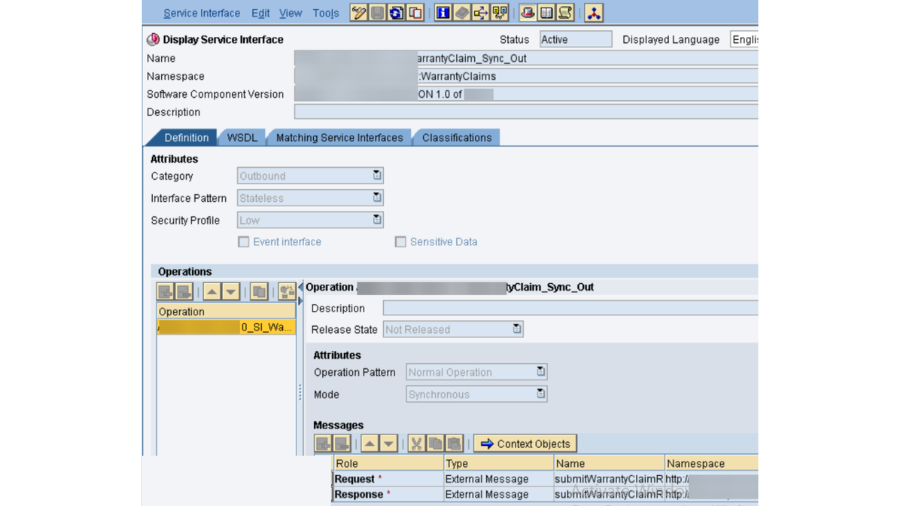
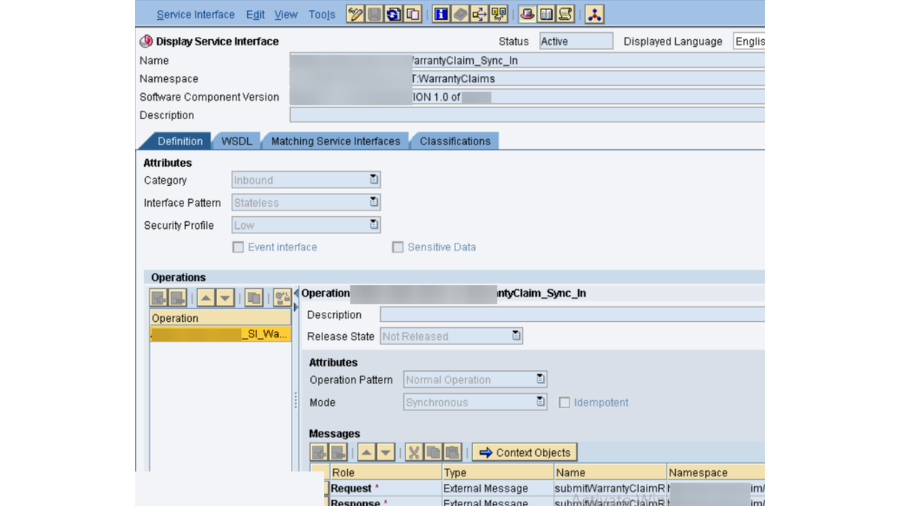
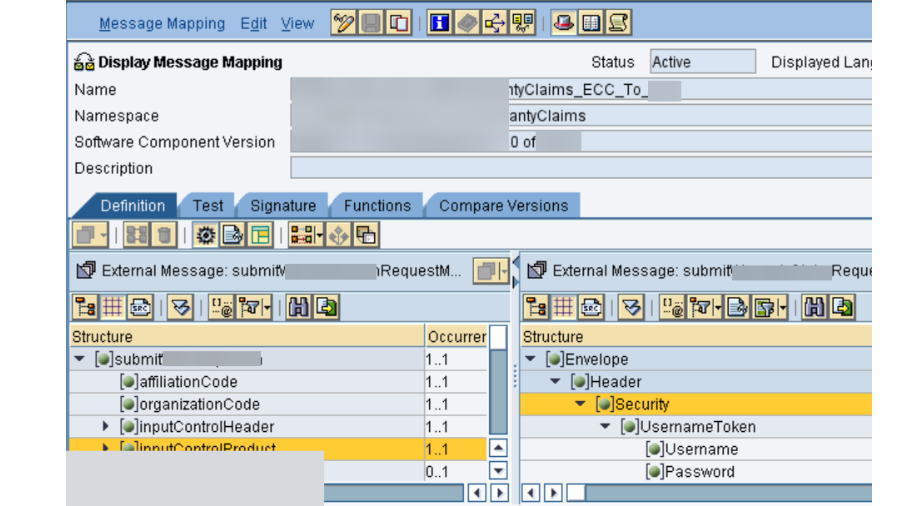
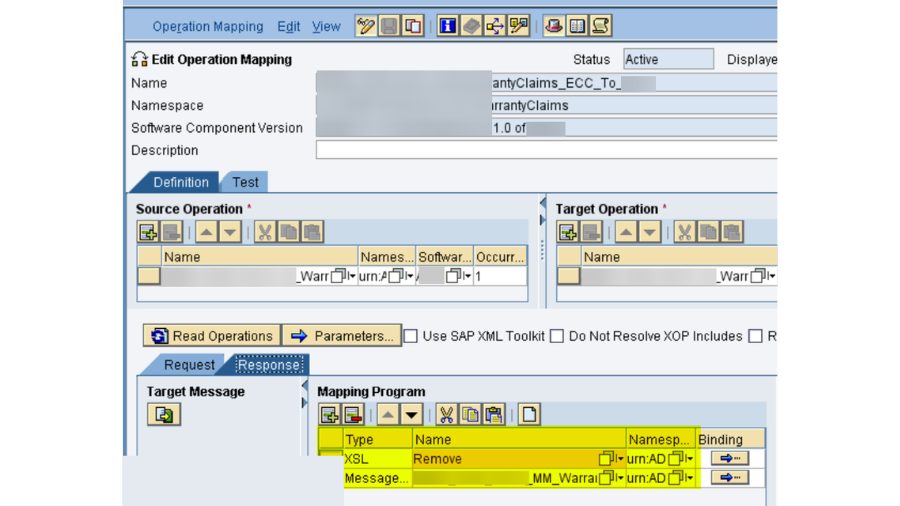
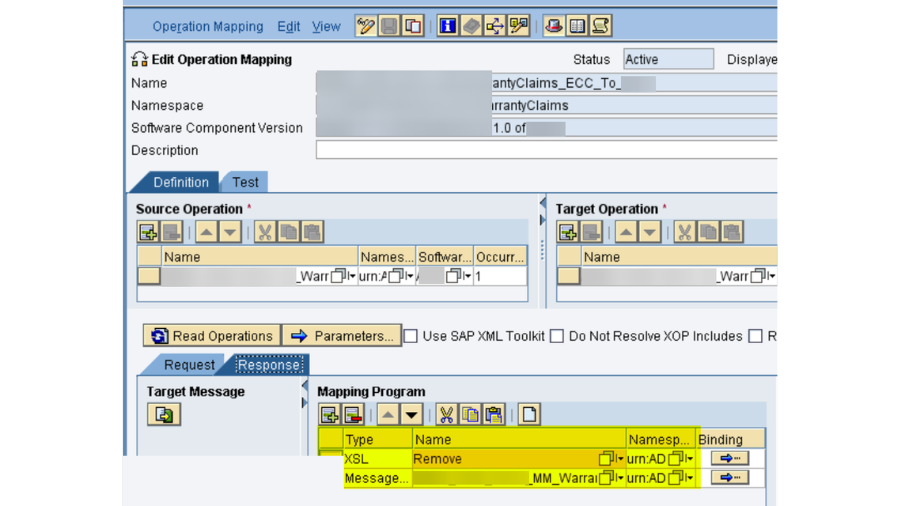
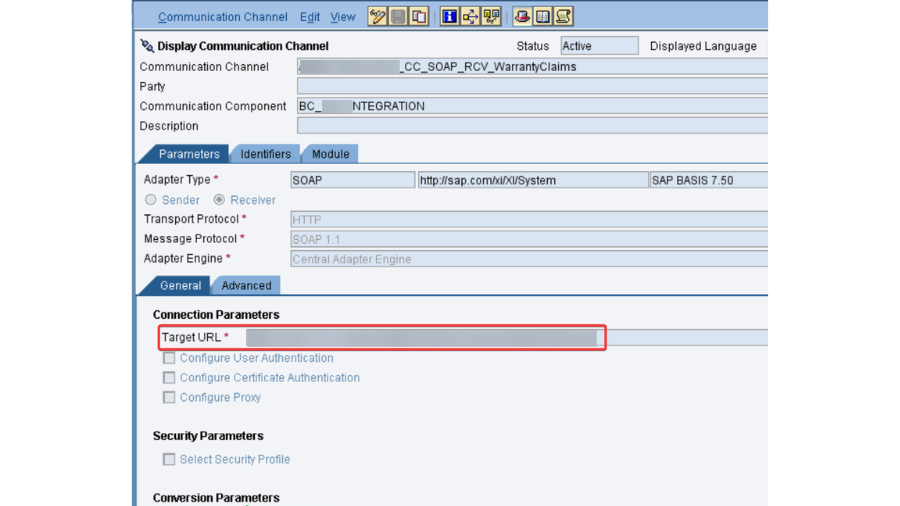
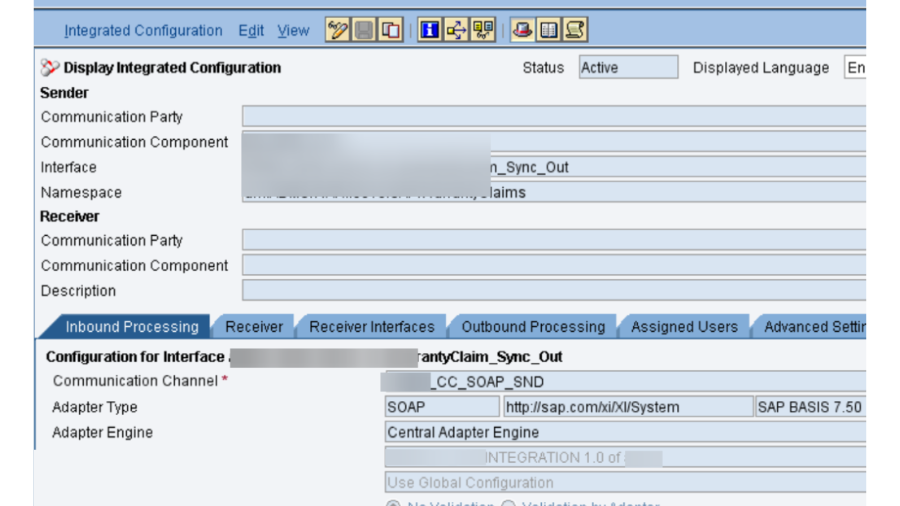
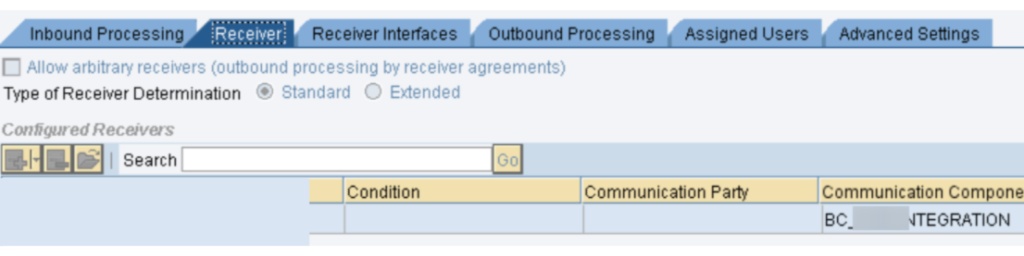
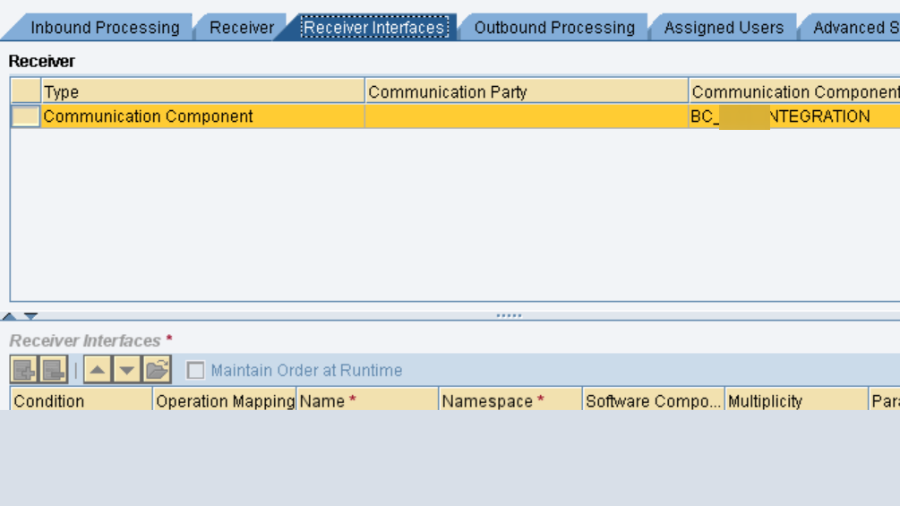
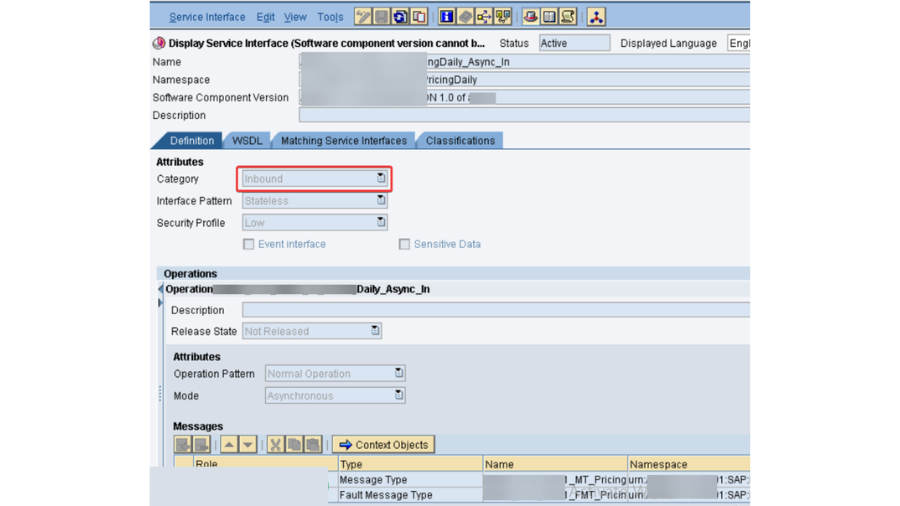
- This one is significant one, as need might arise to check every single part in PO which incorporates PO SLD, PO NWA, PO ESB and PO ID.
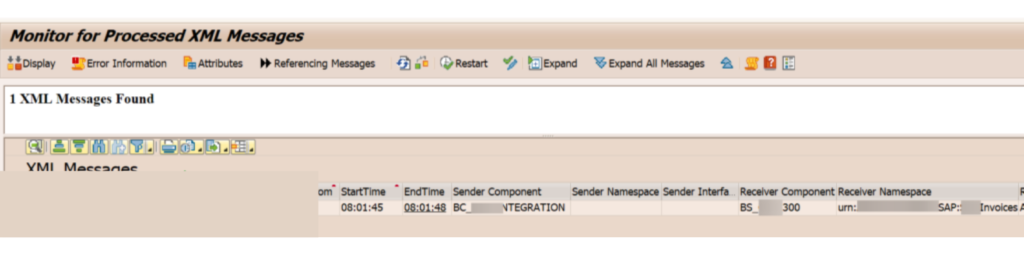
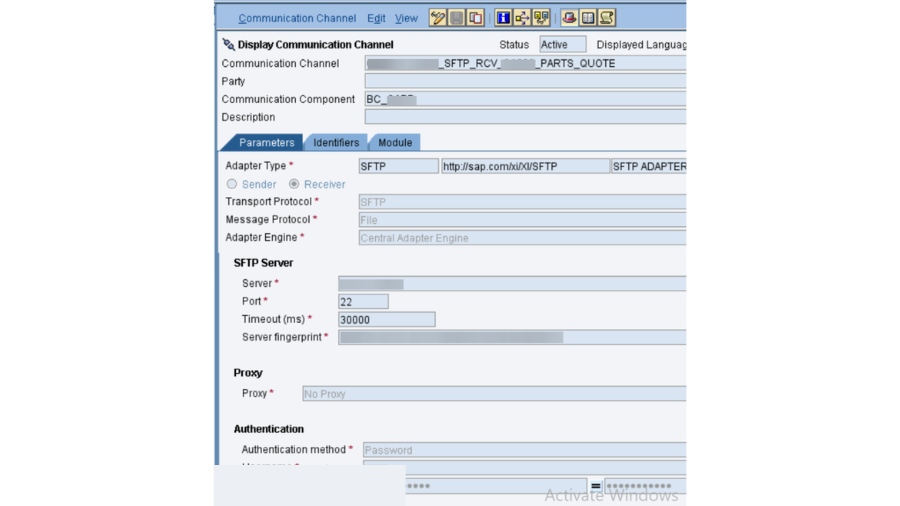
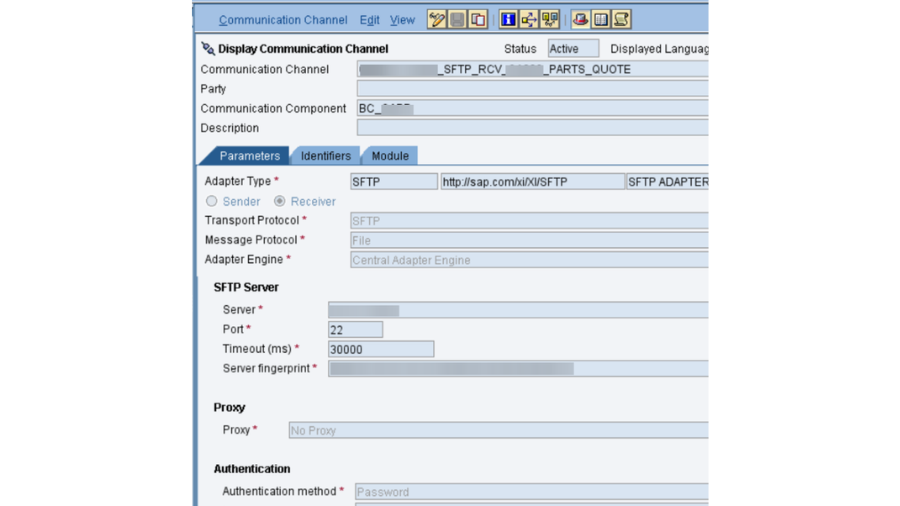
- PO SLD: We really want to confirm that the business framework and specialized framework made in SLD for SAP PO DEV framework is dynamic and accessible. Its smarter to take the screen captures of them before redesign action starts, as these are significant designs.
- PO DEV NWA: In NetWeaver Head, there are numerous setups, authentication and keys that should be checked.
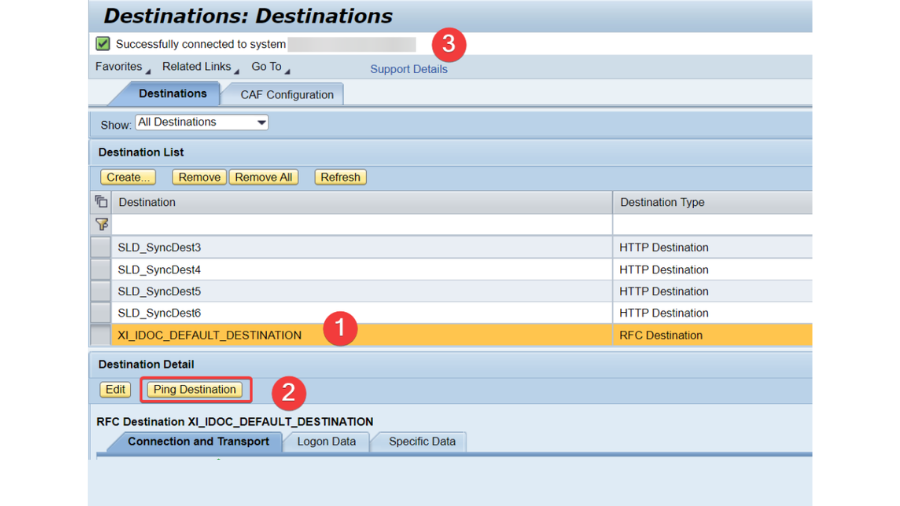
- ECC to PO objective should be checked.
- Accessibility of IDOC objective and furthermore PING Objective test can be utilized for effective association.
- ECC to PO objective should be checked.
- Accessibility of IDOC objective and furthermore PING Objective test can be utilized for effective association.
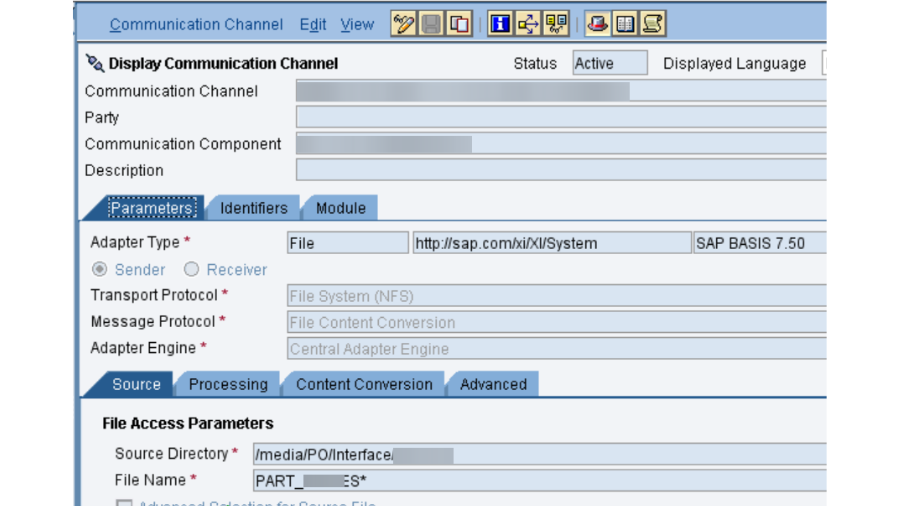
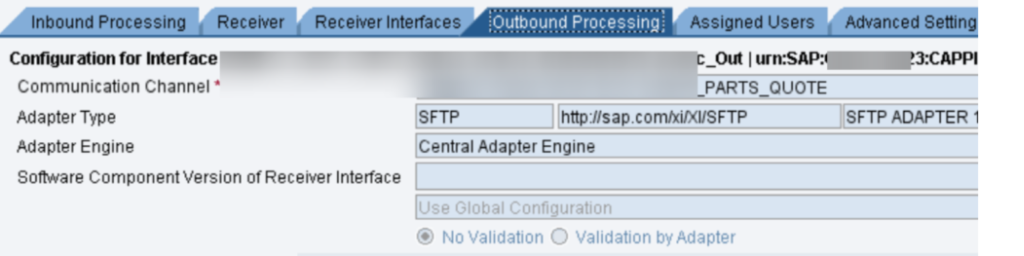
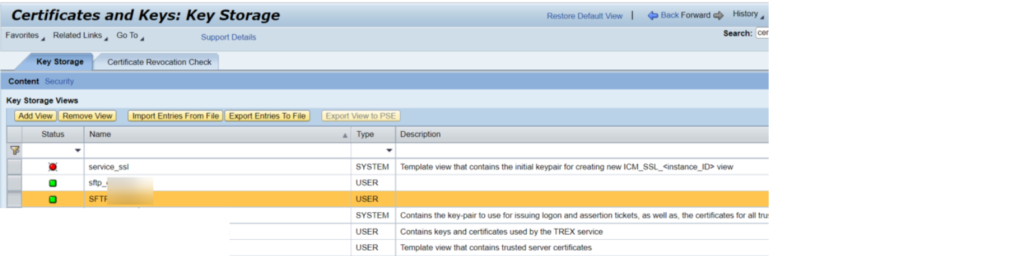
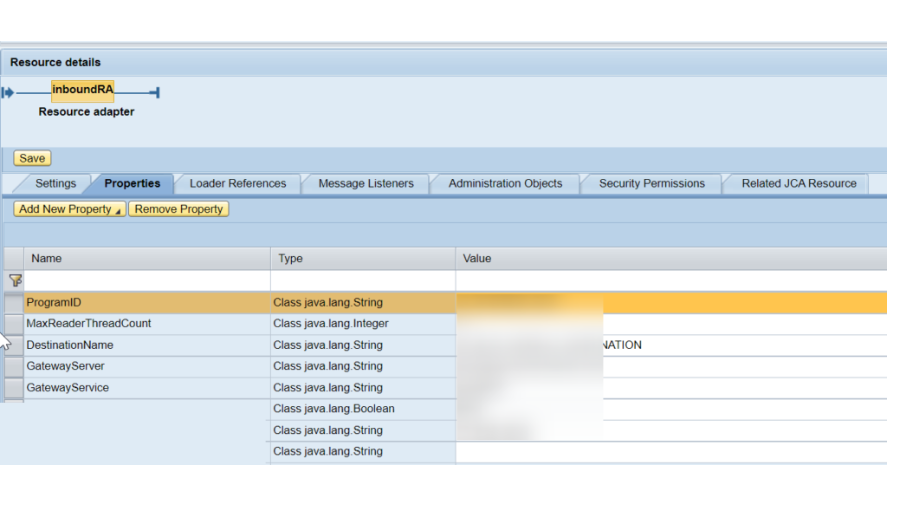
For key based confirmation in SFTP association, we really want to actually take a look at the introduced testaments in NWA – > Setup – > Security – > Declarations and Keys. In our undertaking, we have 2 SSH key based SFTP verification, where with one party, we got public which we introduced in PO NWA and for another party, we produced public and confidential keys through Clay programming and introduced private key in our PO NWA and gave public key to outsider.
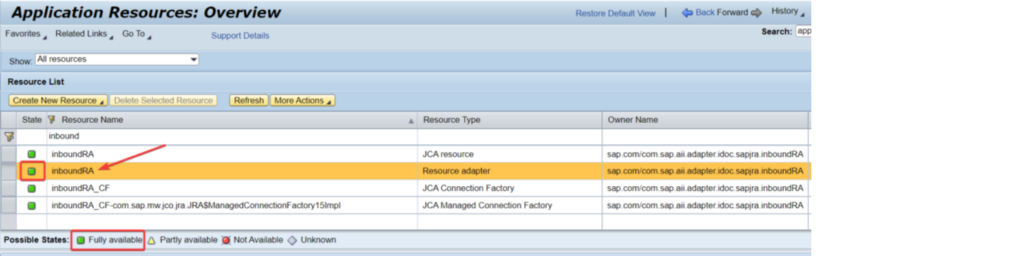
Next setup is for IDOC Inbound network boundaries that should be checked. NWA – > Setup – > Framework – > Application Assets. Whenever there is an endeavor to send IDocs from a source framework to PO, you might see that they are not sent effectively. Around then, you need to investigate three things: SM58 exchange logs, RFC Type HTTP objective availability and InboundRA Asset Connector network boundaries check and its ongoing status. Subsequently, we really want to actually look at the condition of the InboundRA boundary in NWA.
I have made sense of exhaustively in one my blog entry on the most proficient method to design network among ECC and PO. If it’s not too much trouble, actually look at the connection beneath:
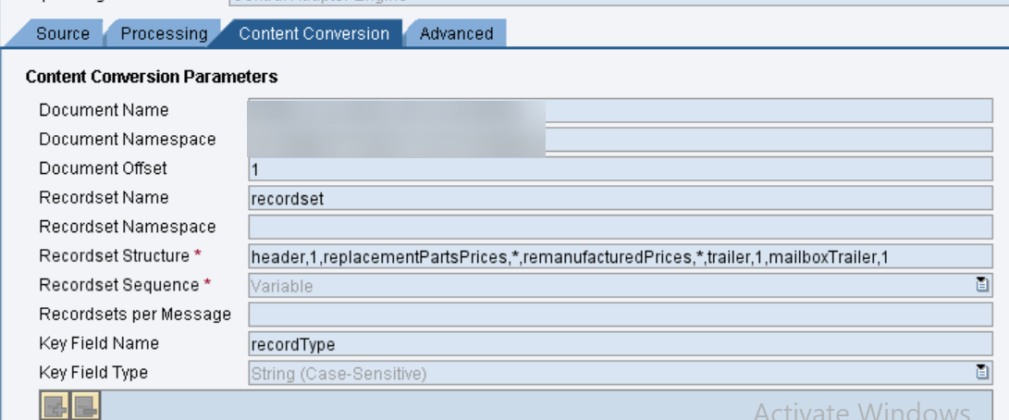
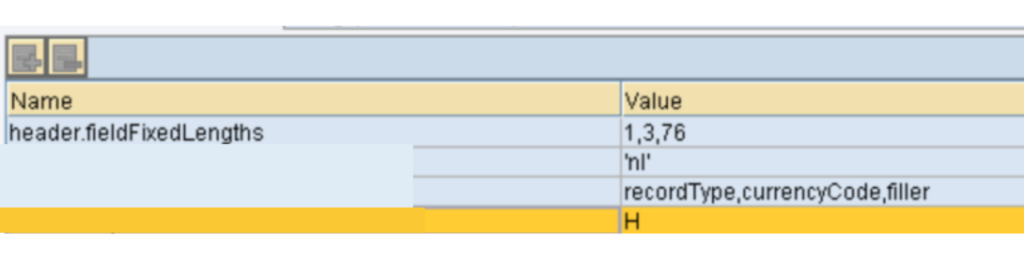
Boundaries kept up with for InboundRA boundary.
Next one is the JAVA MAIL CLIENT. We have designed a ready system in SAP PO, where in the event that there is any issue or point of interaction got flopped because of some explanation, then, at that point, the business will receive messages with the bombed interface subtleties. This is called Ready Arrangement or CBMA (Part based Message Cautioning). To accomplish this, we want to arrange that SMTP email ID, have, port in
NWA – > Setup – > Foundation – > Java Framework Properties – > Administration tab – > Quest for “Java Mail Client”.

Underneath boundaries should be checked:
Mail.from
Mail.smtp.host
Mail.smtp.port
Mail.smtp.password
When all checked, explore to the gig booked for setting off messages.
NWA – > Tasks – > Occupations – > Java Scheduler. Check assuming the occupation made is in Dynamic status.
I have made sense of exhaustively in one my blog entry on the most proficient method to design MAIL Cautions. If it’s not too much trouble, really look at the connection beneath:
* Next one is accessibility check. There are various investigating or log following elements gave by SAP group to PO. We really want to affirm whether those elements are accessible and functioning true to form.
Log viewer – It permits you to see all log and follow messages that are created in the entire SAP NetWeaver framework scene. These log records help you to screen and analyze issues.
Way – NWA – > Investigating – > Logs and Follows – > Log Watcher
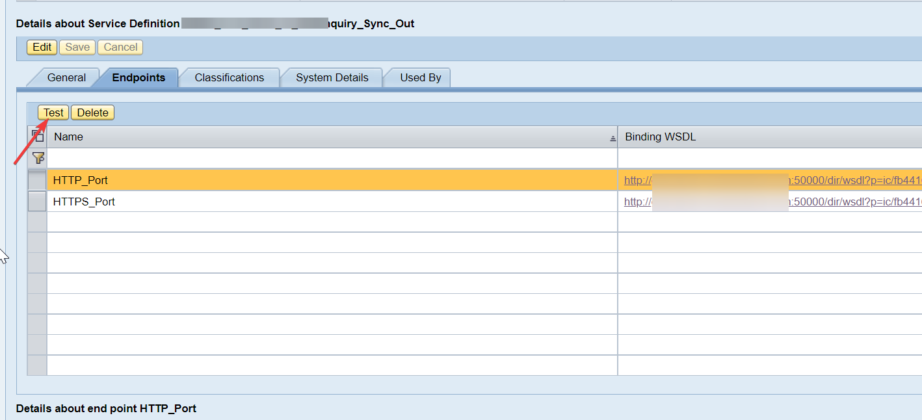
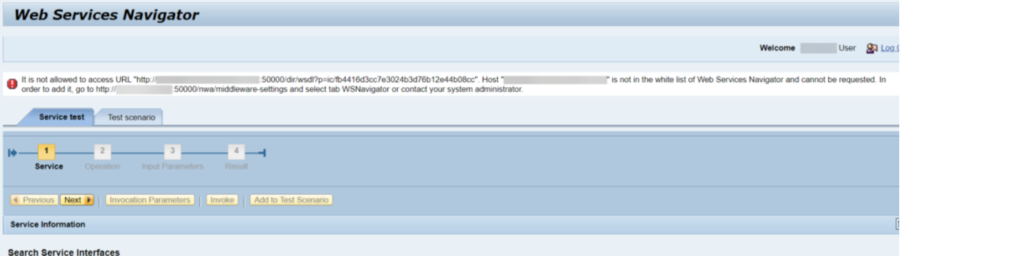
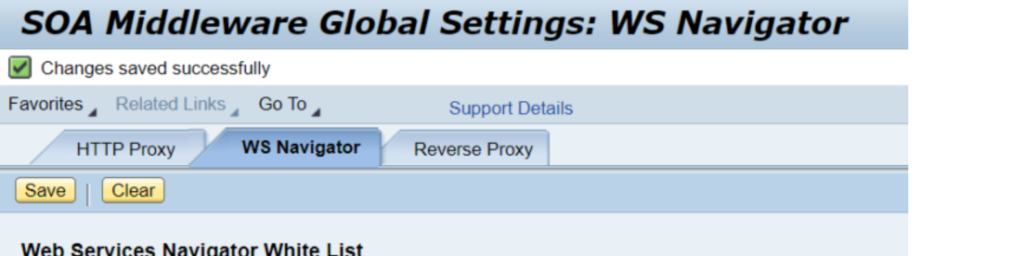
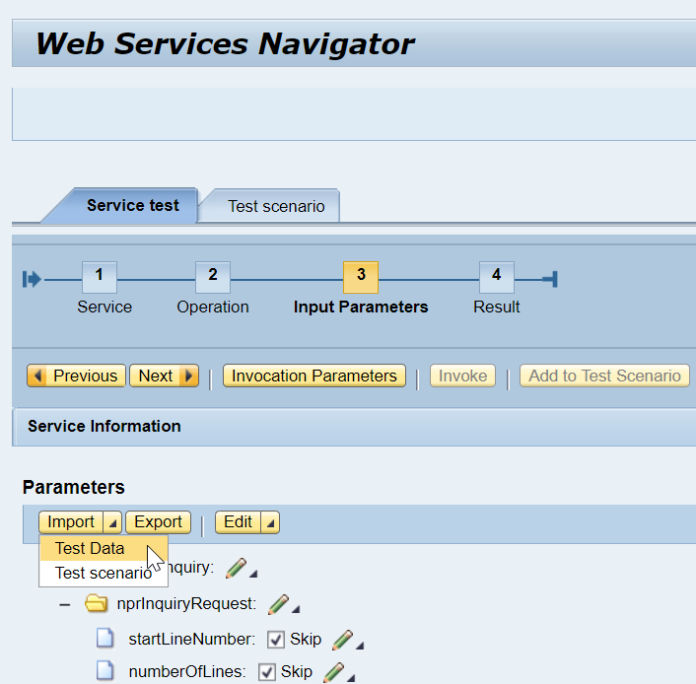
WS Navigator – In WS guide you can test the webservices and it is utilized to show Web administrations conveyed to a server.
Way – NWA – > SOA – > Specialized Setup – > WS Guide
SOA_Manager – The primary object is to consume/uncover webservices from ABAP motor, for instance in an ECC and you don’t have a PI to convey through Cleanser.
TCODE – SOA_MANAGER in ECC
Troubleshooting wizard – To try not to gather superfluous follows, you should be ready to replicate the specific issue. For instance, on the off chance that you can’t sign on with your username and secret phrase, go to the logon page of the application you need to open before you start the wizard. By doing this, you are ready to duplicate the specific issue – the weak logon, without gathering pointless information.
Way – NWA – > Investigating – > Logs and Follows – > Situation Testing
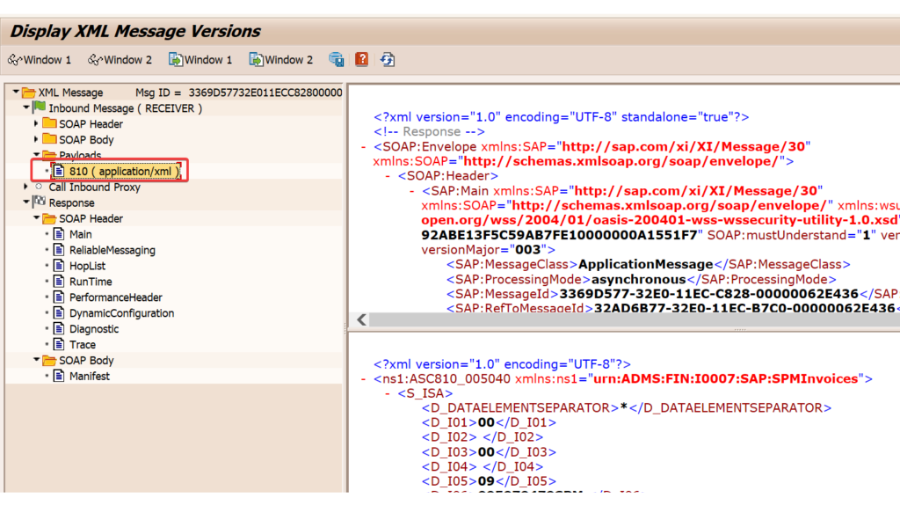
Locations & traces – Logging and following is fundamental for breaking down issues. The Reconciliation Motor purposes logging and following to log and break down the handling steps of messages. While a message is being handled by the pipeline of the Reconciliation Motor, the situation with the message is logged as a different message form.
Way – NWA – > Investigating – > Logs and Follows – > Log Arrangement
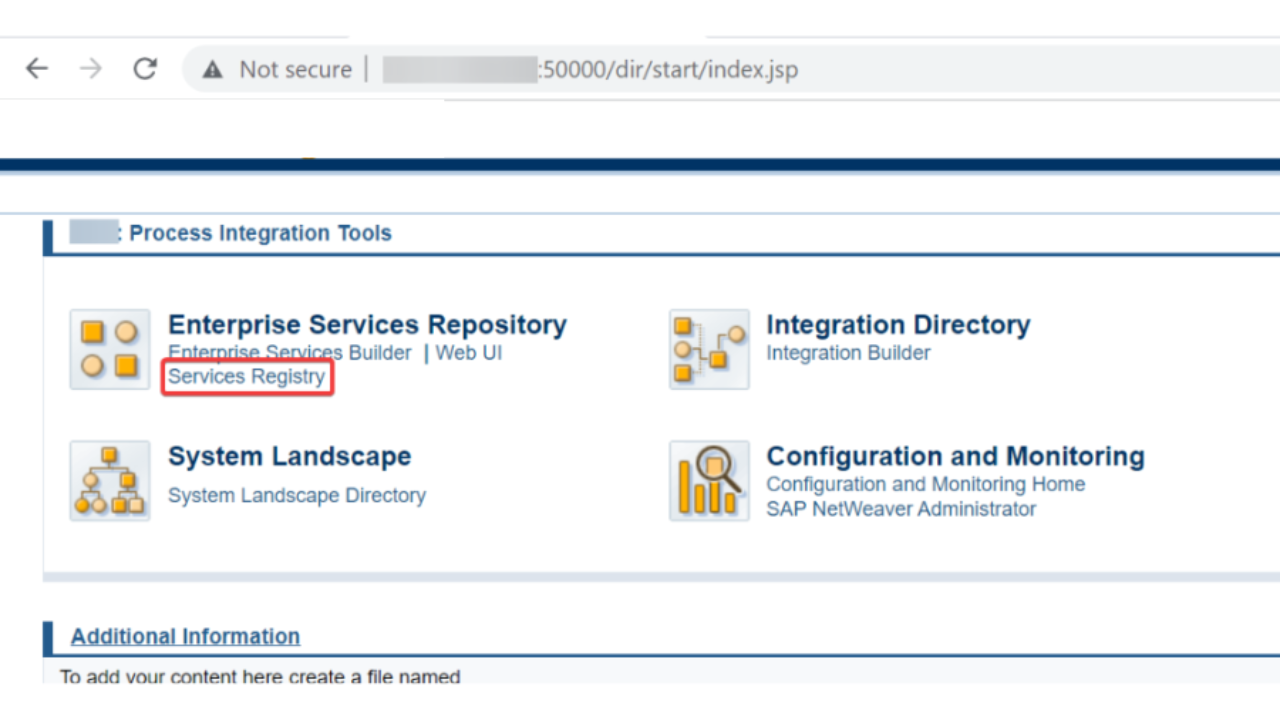
XPI Inspector – Next movement is to check in the event that all clients made in Client The board Motor of SAP PO is accessible. NWA – > Arrangement – > Security – > Personality The board.
URL- http://<host>:<port>/xpi_inspector/index.jsp
* Next movement is to check in the event that all clients made in Client The board Motor of SAP PO is accessible. NWA – > Arrangement – > Security – > Personality The board.
* Then, OData OAuth Login strategy. NWA – > Setup – > Security – > Validation and Single Sign-on. I have designed Essential Secret key login strategy, however you can arrange OAuth rationale strategy moreover. This login strategy might be material for ODATA imported in SAP PO. I have made sense of exhaustively of how an OData can be uncovered and carry out OAuth2.0 system to it without making a connection point. Kindly take a look at the connection beneath:

* All the NWA design checks we have examined. Next is the PO ESR exercises. We really want to check assuming all the product parts we imported in ESR are available.
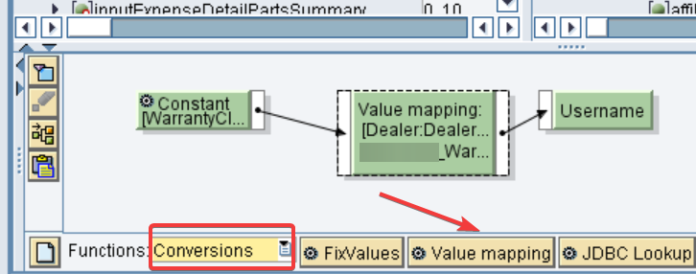
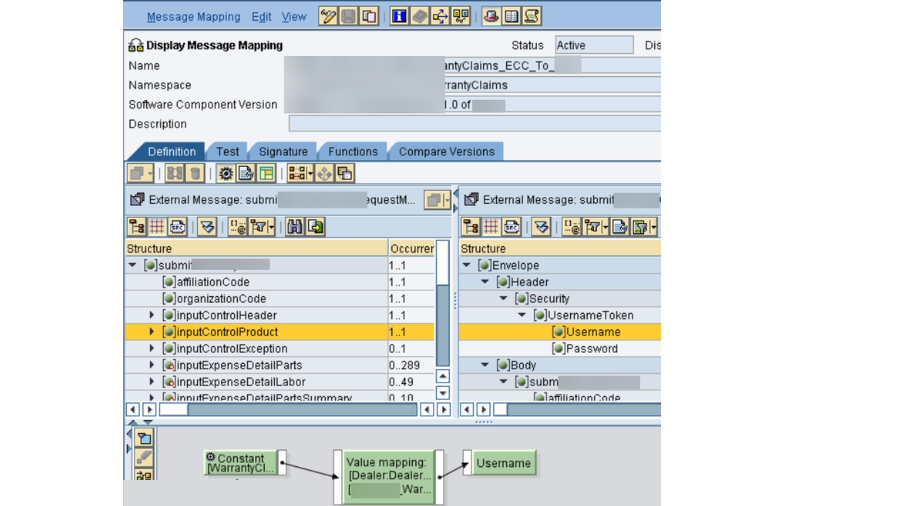
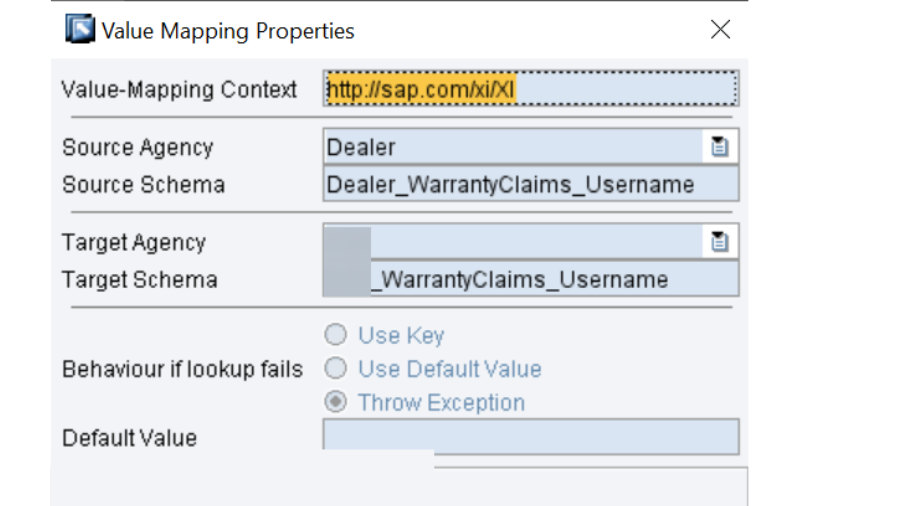
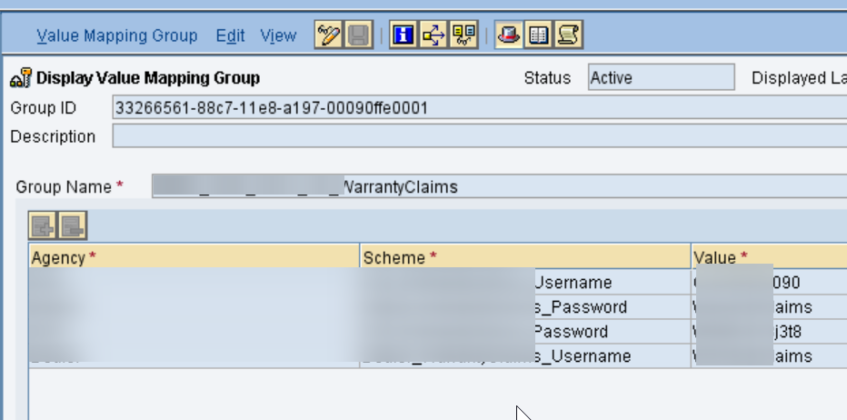
* PO ID exercises. Business parts and business frameworks should be checked. In the Email Ready design, we would have made a Shopper in Coordination Registry, really take a look at its accessibility. To wrap things up is the Worth Planning bunch.
* PO ECC – This isn’t a PO Expert movement and will be finished by Premise group whenever overhaul is finished. Mounting AL11 envelopes in ECC framework. As it is a piece of PO, we want to really look at its accessibility.
- Up until this point, we actually look at 2 classes: Exertion’s assessment and Designs to be checked. Presently we really want to continue on toward next classification – > Connection points to be tried.
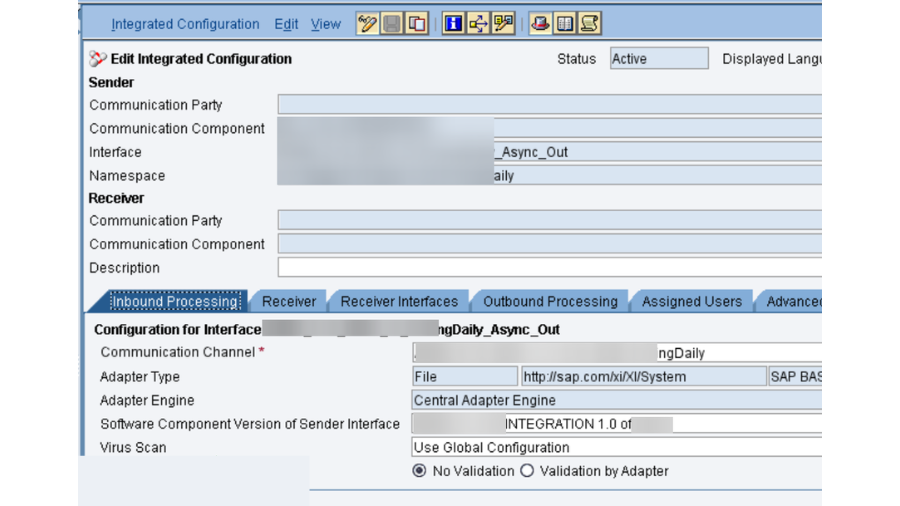
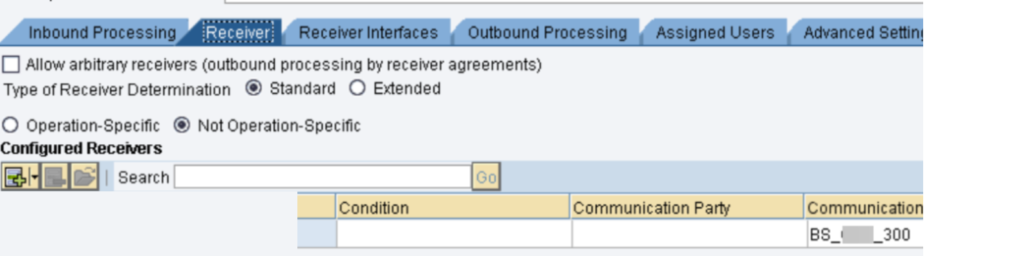
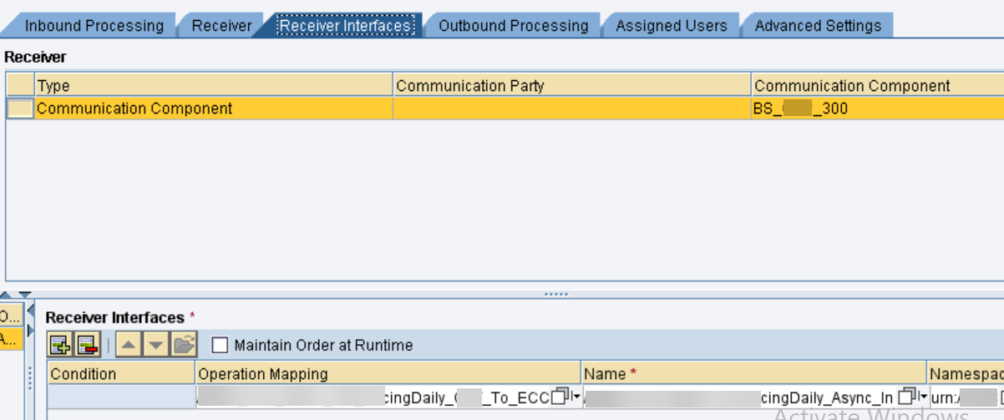
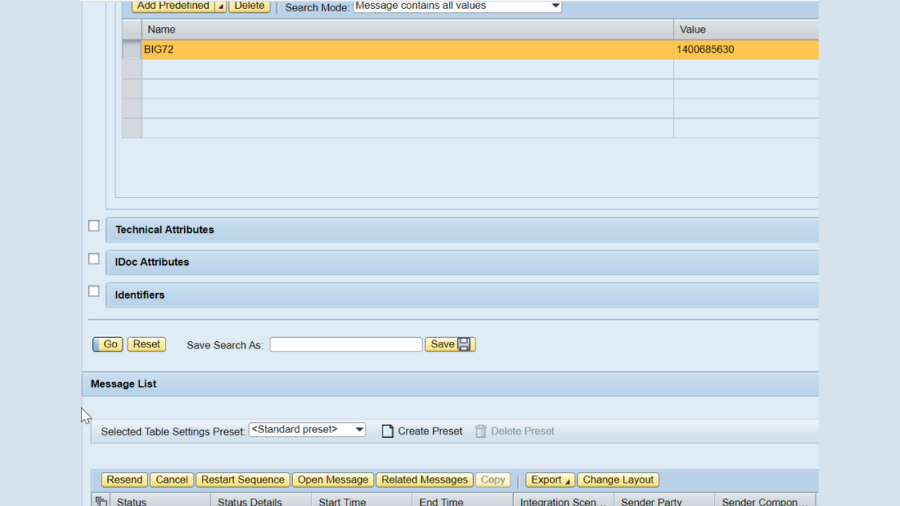
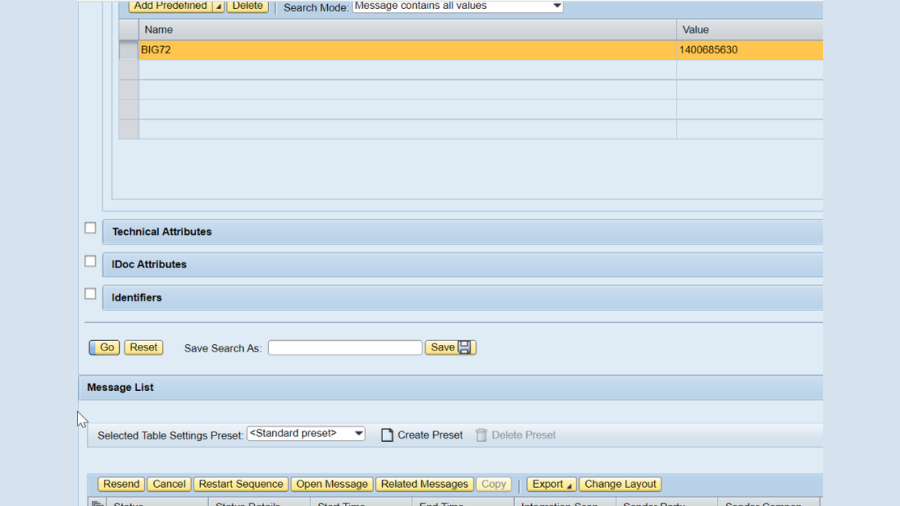
- In the event that the Setups TO BE CHECKED movement is appropriately finished, there won’t be a lot of problem in this class. For the connection points to be tried, we want to sort the connection points in view of the connector type. Like In SFTP, I have handpicked a portion of the connection points (don’t bother taking all SFTP points of interaction) and those points of interaction ought to be the business-basic connection points. Same way do it until the end of the connector types.
How I categorized:
- SFTP
- SOAP
- RFC
- IDOC_AAE
- HTTP_AAE
- REST
- EDI
- FILE
In your undertaking, you probably won’t have created communicates with all of the above connector types. For our situation, we had no RFC interface fabricated, so we made one test interface Being developed framework, RFC <-> Cleanser Webservice coordinated interface.
So we can affirm that all connector types are functioning true to form.

- Next Class is, Elements. Highlights that are getting presented in the NEW Help Bundle can be checked on the web and those accessibility checks ought to likewise should be finished after overhaul is finished.
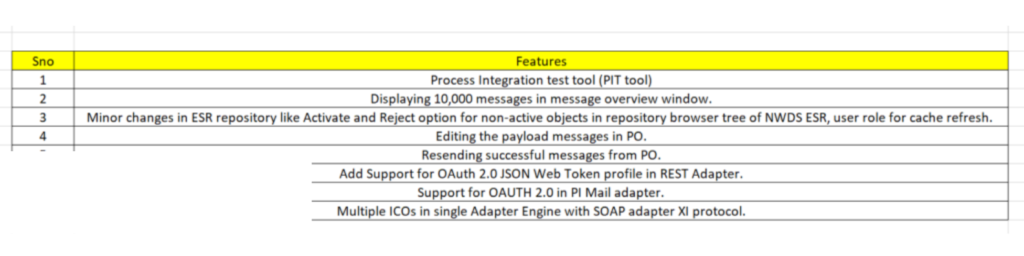
Here are some of the new features available in SP21 compared to SP10. Before upgrading, it’s essential to follow a checklist and Measures to be taken for SAP PO Support Package Upgrade to ensure a smooth transition. This will help in identifying potential risks and preparing the system for the new functionalities while minimizing downtime.
YOU MAY LIKE THIS
ABAP on SAP HANA. Part VI. New Age Open SQL ABAP 740
Bridging the Gap: Integrating ABAP with Other Cloud Services